Additional Tips for Protecting Brick Walls

How To Stop Rainwater From Coming Through Brick Walls: Effective Solutions and Tips

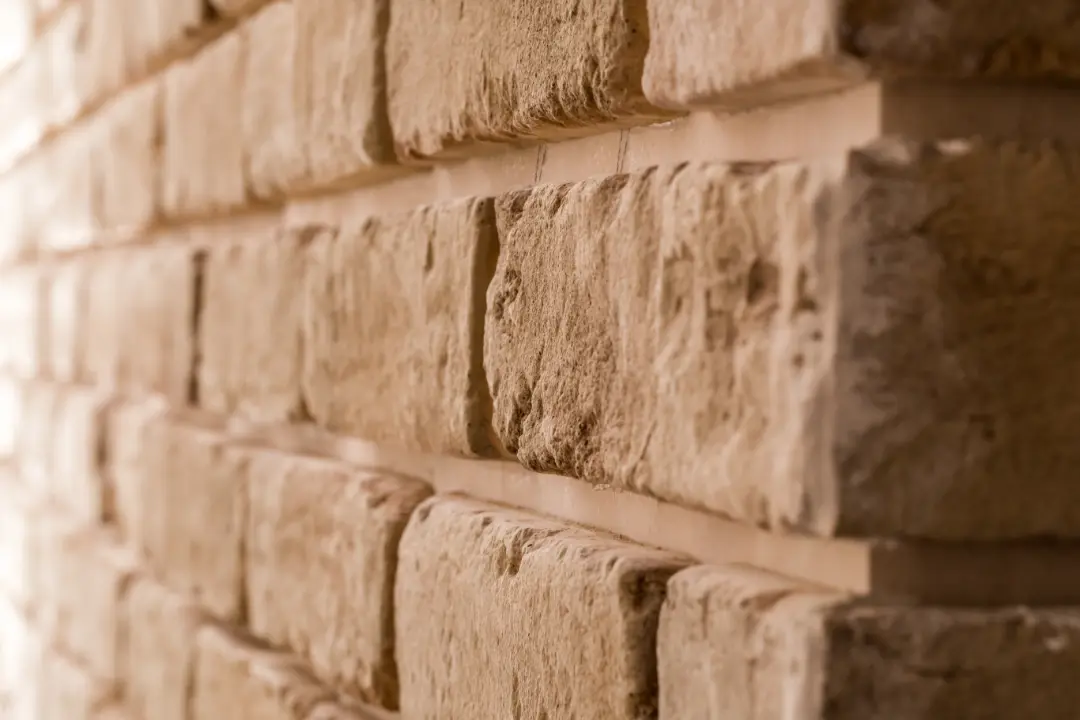
Are you wondering how to stop rainwater from coming through brick walls? In this guide, we will walk you through the causes of water ingress and provide practical solutions to remedy the situation.

Key Takeaways

  • Water ingress in brick walls can cause significant damage and impact home value, necessitating proper drainage and maintenance.
  • Regular inspections and addressing signs of dampness, such as mould and efflorescence, are vital for early detection and prevention of water damage.
  • Effective solutions to prevent rainwater penetration include repointing mortar joints and installing proper drainage systems.

What Causes Water Ingress

Water ingress occurs when water penetrates brickwork from the outside. Brick walls are especially prone to penetrating damp and can suffer severe damage if not properly waterproofed. This problem affects buildings of all ages and can significantly harm brick and masonry structures.

Improper drainage can saturate brick walls, raising the risk of water ingress. Blocked or damaged gutters can cause rainwater to overflow and seep into brickwork. Rising damp, often worsened by poor drainage and landscaping that directs water toward the building, also contributes to water ingress.

Cracks in walls and deteriorating mortar joints create entry points for water, heightening the risk of seepage. The natural porousness of bricks makes them prone to moisture absorption, which can lead to significant water damage if not addressed. 

Understanding Water Ingress in Brick Walls

What Are the Signs of Water Ingress?

Damp patches are often the first signs of water ingress, indicating moisture within the walls. Mould growth and musty odours also suggest water penetration. 

Another sign is efflorescence, which appears as white, powdery deposits on masonry and indicates water saturation.

Ignoring these visual indicators without applying suitable remedial measures can lead to further damage. Addressing these signs promptly can prevent additional water damage and maintain your home’s structural integrity, saving you from costly repairs later.

How to Diagnose Water Leakage Through Brick Walls

Diagnosing water ingress helps identify the root cause and implement effective solutions to prevent further damage. The first step includes conducting thorough inspections and assessments of brick walls.

Internal Inspection

Internal inspections involve looking for internal signs such as:

  • Peeling paint and plaster damage caused by rainwater ingress
  • Damp patches on walls and ceilings indicate water penetration
  • Leaks in plumbing systems can help avoid moisture problems

Modern technology, like thermal imaging, can accurately detect hidden water leaks and holes. You should have a brick expert perform routine inspections to catch water damage early and identify any potential leaks.

Internal inspections are vital for maintaining your home’s structural integrity.

External Inspection

Inspecting exterior walls for cracks is essential, as they can allow water to penetrate and cause further damage. 

Damaged mortar joints indicate a risk for water ingress, necessitating inspection and repair. Addressing standing water around the foundation promptly prevents water ingress into brick walls.

Penetrating damp can appear higher than 1 meter without a visible ground source, unlike rising damp, which is usually below that height. Professional assessments can pinpoint the root cause of water ingress, ensuring the best solution and effective solutions are implemented.

Solutions to Stop Rainwater Penetration

To stop rainwater penetration through your brick walls, solutions like repointing mortar joints, applying waterproof sealants, and installing proper drainage systems are generally required. These measures maintain the integrity of brick walls and prevent water ingress.

Solutions to Prevent Rainwater Penetration

Repointing Mortar Joints

Repointing involves removing old mortar and replacing it with new mortar, restoring masonry integrity and preventing water ingress. Faulty mortar should be re-pointed with a suitable sand/cement or sand/lime mix to ensure durability against water penetration.

A mortar mix with water-repellent additives enhances the durability of mortar joints, providing long-lasting protection against rainwater. This process is essential for maintaining the structural integrity of brick walls and preventing penetrating damp.

Applying Waterproof Sealants

Applying breathable waterproof sealants to brick walls reduces moisture damage, allowing trapped moisture to escape. High-quality breathable waterproofing creams can significantly lower the risk of moisture damage in walls, ensuring a proper seal.

A waterproof membrane can mitigate the impact of rising damp on brick walls. Using waterproof sealants protects brickwork from moisture damage and ensures long-term durability. Note that this should only be used after an accurate diagnosis of the cause that necessitates using a sealant.

Installing Proper Drainage Systems

A proper drainage system, such as French drains, directs rainwater away from building foundations, especially when rain is anticipated. These systems channel rain effectively, reducing the risk of water ingress.

Regularly clearing gutters and downspouts prevents water pooling and ensures proper drainage away from the foundation. Effective drainage systems are vital for maintaining the structural integrity of brick walls.

Preventative Measures for Long-Term Protection

Preventive measures will help you avoid costly future repairs. These steps can identify potential water ingress points before they cause significant damage.

Regular Maintenance Checks

Routine inspections by a brick expert help homeowners catch water damage early. Signs of dampness, such as water stains, peeling paint, and mould, should be addressed promptly.

Preventive maintenance includes fixing cracks, clearing gutters, and repairing downpipes and pipe systems. Regular plumbing checks for leaks help prevent moisture ingress and maintain a dry home.

Gutter and Downspout Maintenance

Regular gutter inspections prevent water accumulation and damage. Clearing gutters of debris regularly is important because:

  • It prevents water from pooling and seeping into walls.
  • It avoids water overflow caused by clogged gutters.
  • It helps prevent structural damage by maintaining proper water flow. Maintenance is essential to keep gutters functioning properly and protect the structure.

Ensuring the ground slope directs water away from the foundation prevents pooling.

Landscaping Adjustments

Excessive water retention in the soil can erode water-resistant barriers, especially around brick foundations. 

Piling excessive soil around the brick foundation can lead to harmful water saturation, negatively impacting the foundation’s structural integrity.

Trimming overgrown plants reduces moisture around brick foundations, helping to prevent water ingress. You can also ensure proper soil grading around foundations, as this directs water away from brick walls, to reduce the risk of water ingress.

Why You Should Choose Professional Repointing Over Using DIY Sealants

Waterproof sealants are often advertised as quick fixes for rainwater penetration but they can do more harm than good when used alone. 

Most off-the-shelf sealants form an impermeable layer over brickwork, preventing moisture escape and accelerating internal damp. Therefore, sealants should never replace structural remedies like repointing deteriorated joints, repairing cracks, or improving drainage. They are not the first line of remedies without an accurate diagnosis.

Some of our clients come to us after failed attempts with cheap silicone sprays or DIY repointing jobs using inappropriate cement mixes. These short-term fixes don’t last, and they can mask growing issues until serious damage appears. 

Our inspections catch problems before they become costly, and our methods are always tailored to the property’s age, materials, and unique exposure to rain. Contact us today.

Environ Property Services: The London Experts for Brick Repointing

At Environ Property Services, we combine expert inspection with precision repairs that protect your home for decades. We offer professional lime mortar repointing. 

When you hire us for this restoration service, we will remove decayed mortar by hand, assess the original mortar mix, and apply a bespoke lime mortar that is breathable, durable, and tailored to your property’s specific needs. 

This will give your home a watertight wall that resists moisture, adapts to seasonal movement, and preserves the integrity of your brickwork.

With over 15 years of experience safeguarding London homes from water ingress, our director, Terry Clark, a member of The Society for the Protection of Ancient Buildings, personally oversees all major works to ensure every finish is conservation-grade. 

From period homes with soft, porous bricks to modern builds experiencing rain soak-through, our services provide a reliable, long-term barrier against damp. We also offer damp proofing services.

So, if you are seeing signs of water penetration like efflorescence, cracked mortar, or interior damp patches, call us today or request a callback. We’ll inspect, report, and resolve the issue with expert care and craftsmanship.

Additional Tips for Protecting Brick Walls

Combining protective measures, proper ventilation, and maintenance ensures the integrity of brick walls. These include:

  • Using breathable paints
  • Addressing rising damp to protect brick walls from water ingress
  • Ensuring proper indoor ventilation to mitigate moisture buildup
  • Applying Stayntech® brick stains protects the brick while allowing natural evaporation.

These measures help maintain the structural integrity of brick walls.

Additional Tips for Protecting Brick Walls

Using Breathable Paints

Breathable paints:

  • Allow moisture to escape
  • Provide a protective layer against water ingress
  • Reduce the risk of damage from damp by allowing trapped moisture in brick walls to escape.

Breathable paints prevent moisture accumulation within the walls and on surfaces, avoiding potential water damage and maintaining the brickwork’s structural integrity.

Addressing Rising Damp

Rising damp results from ground moisture rising through capillary action in brickwork, often worsened by heavy rain and high humidity levels. This moisture can cause damp patches on interior walls, mould growth, and a musty odour, signalling the need for prompt action.

A damp proof course prevents water from rising through the bricks. High-quality damp proofing materials and techniques effectively block moisture, protecting your brick walls’ structural integrity. Addressing rising damp promptly keeps your home dry and safe.

Frequently Asked Questions

What are the common causes of water ingress in brick walls?

Common causes of water ingress in brick walls include poor drainage, blocked gutters, cracks in the brickwork, and rising damp. Addressing these issues is crucial for safeguarding your home against moisture damage.

How can I tell if my brick walls are experiencing water ingress?

Look for damp patches, mould growth, or efflorescence on your brick walls. If you notice any of these signs, it’s essential to address the issue quickly to avoid further damage.

Why is professional help important in addressing water ingress issues?

Professional help is crucial for accurately diagnosing water ingress issues and implementing effective solutions. 

Specialists can provide tailored restoration services that maintain both the structural integrity and aesthetic appeal of your property.

How often should I conduct maintenance checks on my brick walls?

You should conduct maintenance checks on your brick walls every few years and after severe weather conditions to catch and address any potential issues early. Regular inspections are key to maintaining their integrity and longevity.

Conclusion

Protecting your brick walls from rainwater penetration involves understanding water ingress, identifying its causes, and implementing effective solutions and preventative measures. 

Regular inspections, proper drainage, and the proper use of waterproof sealants and breathable paints are crucial in maintaining the integrity of your brick walls.

Choosing our experienced and professional services ensures quality and reliability when addressing water ingress issues. By taking these steps, you can safeguard your home from water damage, preserving its value and structural integrity for years to come.

Eco-friendliness of repointing

Repoint or Render: Which is Better for Your Home?

If you’re trying to decide whether to repoint or render, this article will guide you to the best option for your home. 

We will compare these methods based on cost, durability, and visual appeal, so that you can make the best choice for maintaining your property.

Key Takeaways

  • Repointing strengthens brick walls by replacing damaged mortar, improving both stability and aesthetics.
  • Rendering offers a protective layer over masonry, enhancing curb appeal while addressing weather damage, but it can be more costly.
  • Both methods have their benefits; repointing generally requires less maintenance and has a longer lifespan than rendering.

Understanding Repointing

Repointing, often overlooked, is a cornerstone of maintaining the beauty and stability of brick structures. Have you walked past an old house with damp cracks in the crumbling mortar joints? The sight is not just an eyesore but also a precursor to potential structural issues. 

What is repointing?

Repointing is the meticulous process of removing mortar and replacing damaged mortar joints in brickwork. It involves carefully raking out the old mortar and applying new mortar to restore the wall’s integrity, which can be replaced.

The quality of repointing work largely depends on the professionals’ expertise. So, it is always best to hire seasoned repointing experts to ensure the job is done correctly, prevent future problems, and maintain structural integrity.

What is repointing?

What Are the Benefits of Repointing?

The benefits of repointing extend beyond mere aesthetics and include:

  • Using lime mortar in repointing allows moisture to escape, effectively addressing dampness issues.
  • It significantly strengthens the joint between bricks.
  • It enhances the overall structural stability of your property.

Additionally, repointing can greatly improve the visual quality of brick structures, preserving their historical character and making them look well-maintained and attractive, which can force a positive impression on viewers.

When Should You Repoint?

Knowing when to repoint is crucial for the longevity of your brickwork. General indications for repointing include:

  • Crumbling mortar
  • Water penetration
  • Loose bricks 

So, if you are seeing visible wear in mortar joints, it clearly indicates the need for repointing to prevent further damage. Ignoring these signs can lead to more severe structural damage and costly repairs in the future.

What is rendering?

Rendering involves applying a mix to the surface of walls or buildings to enhance appearance and protect against weather damage. This typically involves mixing materials like cement and lime with water to seal moisture and applying the mixture using various techniques.

Rendering provides an alternative method for maintaining and enhancing your home’s exterior. While repointing focuses on the mortar joints in brickwork, rendering involves applying a material layer over masonry to protect and beautify the underlying structure.

Rendering is an excellent option for covering deteriorating brickwork or achieving a sleek, modern look.

What Are the Benefits of Rendering

Rendering provides a host of benefits. Modern rendering materials resist cracking, enhancing durability and reducing maintenance. Certain materials, like silicone-based renders, enhance energy efficiency by effectively enhancing thermal performance and managing moisture.

Rendering also significantly boosts a building’s visual appeal, offering finishes from smooth and modern to rustic and traditional.

Benefits of rendering

When Should You Render?

Rendering is especially useful for covering deteriorating brickwork or achieving a consistent appearance across exterior walls. 

It’s also a great option for unifying the look of an extension with the main structure, preventing mould growth.

Rendering enhances property protection and offers a chance to modernise its appearance.

Comparing Costs: Repointing vs. Rendering

Repointing and rendering costs can vary widely depending on the condition of the brickwork, the type of materials used, and the complexity of the project.

Labour typically constitutes a significant portion of the expenses, with additional costs potentially arising from scaffolding for taller structures, removal of old materials, and preparation work. 

The choice of render type also influences the overall cost, especially for more expensive, higher-end options. Prices are influenced by many factors, and it’s advisable to obtain detailed quotes tailored to your specific project requirements.

Durability and Maintenance

Both repointing and rendering provide long-term solutions, though with different maintenance needs. Repointing requires less frequent maintenance, making it a more durable long-term option.

Longevity of repointing

Properly done repointing can last from 20 to 50 years, depending on environmental factors and the quality of initial work.

However, regular inspections and minor repairs are needed every 10-20 years to ensure repointing longevity.

Longevity of rendering

Rendered surfaces generally offer a good lifespan, balancing aesthetic enhancement and structural integrity. Regular maintenance, including inspections and repairs, is also essential to ensure their longevity.

Aesthetic Considerations

Aesthetics are crucial in choosing between repointing and rendering. Both methods significantly influence your property’s visual appeal, aligning with your style preferences.

Visual appeal of repointing

Repointing greatly enhances a property’s visual appeal, making it look well-maintained and attractive. The process highlights the intricate details of pointed brickwork, contributing to a more polished and charming facade.

Choosing the right mortar colour and type ensures a proper aesthetic match with the existing mortar brick.

Visual appeal of rendering

Rendering acts as both a protective layer and a decorative finish for whole-house homes. 

It offers various textures and finishes, allowing homeowners to completely transform their property’s aesthetic outlook.

Environmental Impact

Environmental considerations are becoming increasingly important in home improvement projects. Both repointing and rendering offer eco-friendly options to help reduce your home’s carbon footprint.

Eco-friendliness of repointing

Repointing with lime mortar is sustainable and offers several benefits:

  • Made from natural materials
  • Has a lower ecological footprint compared to modern cement
  • Its flexibility allows it to absorb moisture and prevent damage to the underlying brickwork
  • Helps maintain the structural integrity and aesthetics of older buildings
Eco-friendliness of repointing

Eco-friendliness of rendering

Rendering offers sustainability benefits through materials that improve energy efficiency and longevity. However, it’s important to consider the environmental impacts of rendering techniques, including the carbon footprint of different materials and their effects on local ecosystems.

How Poor Repointing Wastes Money and Destroys Brickwork

Many property owners make the costly mistake of choosing cheaper, cement-based repointing jobs, only to face cracking bricks, rising damp, and irreversible wall damage within a decade.

Unlike lime mortar, cement doesn’t flex or breathe with the wall. It traps moisture, pushing it into the brickwork, which leads to decay from the inside out. These repairs often end in needing brick replacements or full structural restorations, costing far more than a proper repointing job would have.

A one-time investment in professional repointing protects your property for generations.

Environ Property Services: The Gold Standard in London Brick Repointing

At Environ Property Services, brick repointing isn’t just another building task but a skilled heritage service that protects your home for decades. We specialise in traditional lime mortar repointing, hand-mixed on-site to suit the specific composition of your property’s original mortar.

Our approach is meticulous, beginning with a thorough assessment of your brickwork. We carefully rake out deteriorated joints by hand to prevent damaging the surrounding bricks. Next, we apply a lime mortar that is chosen for its durability, flexibility, and breathability—essential qualities for maintaining the health of both historic and modern masonry.

Led by director Terry Clark, a member of The Society for the Protection of Ancient Buildings (SPAB), our team is trained in traditional conservation methods that many modern contractors overlook. That means no damaging cement mixes, no rushed finishes, and no “one-size-fits-all” shortcuts.

Whether we are restoring a Georgian terrace in Kensington or protecting a Victorian façade in Clapham, we honour the original character of your building while reinforcing its future strength. Our repointing is sure to last over 60 years, with craftsmanship designed to prevent damp, cracking, and costly structural failure.

Call us today to receive a detailed quote.

Frequently Asked Questions

What is repointing?

Repointing is basically fixing up your brickwork by taking out the old, damaged mortar and replacing it to keep your walls strong and looking good. It’s essential for maintaining the integrity of your structure!

When should I consider repointing my brickwork?

If you see crumbling mortar, water penetration, or loose bricks, it’s time to think about repointing your brickwork. Keeping an eye on these signs will help maintain the integrity of your structure.

What are the benefits of rendering a property?

Rendering a property boosts its durability and visual appeal while improving energy efficiency, giving you a variety of aesthetic choices to enhance its overall look. It’s a smart investment for both style and performance!

How long does repointing typically last?

Repointing done right can last more than a century with just a little maintenance. So, if you want it to last, be sure to use quality materials and techniques!

Why is professional consultation important for repointing and rendering projects?

Getting professional consultation for repointing and rendering projects is crucial because it guarantees high-quality results and customised solutions, preventing costly mistakes down the line. Trusting experts can make all the difference in your project’s success!

Conclusion

Both repointing and rendering offer unique benefits that can enhance your home’s structural integrity and visual appeal. Repointing is ideal for preserving the character and stability of brickwork, while rendering provides a modern, protective finish. 

Understanding the costs, durability, maintenance, and environmental impact of each option will help you make the best decision for your property. Whether you choose repointing or rendering, professional consultation is key to achieving the best results.

We Offer Reliable Damp-Proofing Services

Damp Vs Condensation: How To Detect And Fix Both – Environ Property Services

Determining whether you’re dealing with damp or condensation is crucial for effective treatment and preventing long-term damage. 

Damp and condensation are often confused, but they arise from different causes and require different solutions. 

This article will help you understand the differences between damp and condensation, identify their signs, and explore suitable treatments to protect your home.

Key Takeaways

  • Damp and condensation are distinct issues; dampness originates from external moisture, while condensation results from warm air meeting cold surfaces.
  • Identifying the signs of damp (such as water stains and musty smells) and condensation (like mould and water droplets) is crucial for effective treatment.
  • Professional assessment and intervention are often necessary for long-term solutions to damp and condensation problems.

A Brief Overview of Damp and Condensation

Damp and condensation, though frequently confused, differ fundamentally in their origins and implications. Damp refers to the presence of excess moisture within a building’s structure, often arising from external sources like rain or groundwater. On the other hand, condensation occurs when warm, moist air comes into contact with cold surfaces, leading to moisture buildup.

If you misinterpret these issues, it can lead to ineffective treatments and persistent problems. Determining whether the issue is condensation or another damp problem is crucial for selecting the appropriate solution, as each damp problem—such as rising or penetrating damp—requires a different approach. For instance, treating condensation problems with solutions meant for rising damp would be futile and vice versa. This distinction is key to maintaining a healthy, damage-free home.

A Brief Overview of Damp and Condensation

What is Damp?

Damp, in its simplest terms, is the presence of excess moisture in a building’s structure. This moisture can enter homes through various routes, leading to different types of damp, such as rising damp and penetrating damp. In extreme cases, untreated damp can lead to irreversible water damage that compromises the safety of walls and flooring. Moisture creeping up from the ground may also result in the decay of timber beams and floorboards.

Rising damp is often seen in older buildings where the damp-proof course is either damaged or non-existent. It is characterised by tide marks on walls and skirting boards, indicating moisture rising upwards through capillary action. If left untreated, rising damp can cause serious structural problems, including damage to plaster, timber, and even the building’s foundations.

Penetrating damp occurs when moisture enters a building from outside sources. This can happen due to issues like broken roof tiles or faulty window installations. This type of damp can lead to significant damage to walls and ceilings. It often shows up as damp patches or discolouration. Recognising these signs early is crucial. Understanding them is key to effective damp treatment and prevention.

What is Condensation?

Condensation is a common form of moisture buildup that occurs when warm, moist air meets a colder surface. This interaction causes water vapour to condense into liquid water, forming water droplets on windows, walls, and other surfaces. Unlike rising damp or penetrating damp, condensation damp is primarily an internal issue, often exacerbated by activities that generate high humidity levels, such as cooking, showering, and drying wet clothes indoors.

If condensation is recurring during rainy weather, it may be linked to heat loss through exterior walls or poor insulation. Tackling these issues helps maintain thermal comfort and reduces the likelihood of mould recurrence. Common areas affected by condensation include kitchens, bathrooms, and poorly ventilated spaces like corners of rooms or areas behind furniture.

If left unaddressed, condensation can result in mould growth, which poses serious health risks and can further damage the property. Recognising the signs and understanding how condensation forms are essential initial steps in addressing the problem.

How to Identify the Signs of Damp and Condensation

A damp home, caused by excess moisture, can promote mould growth, damage walls and furniture, and pose significant health risks. Spotting the early signs of damp and condensation helps prevent extensive damage and maintain a healthy home environment.

Damp, condensation, and mould are often interconnected, and their presence can significantly impact a property’s structural integrity and the health of its occupants. It is important to address both mould and damp together—referred to as both mould—to effectively prevent health risks and property damage. Learning to recognise the signs before they escalate can address these issues promptly.

Common Signs of Damp

Penetrating dampness often shows up as water stains or discolouration on walls and ceilings. Persistent stain marks are typical of damp problems and can help distinguish them from condensation, which usually causes black mould patches instead. These damp patches can result from issues such as leaky gutters, broken pipes, or defects in the building’s exterior that allow water to seep in. Addressing these problems early is crucial to preventing further structural damage and maintaining the property’s overall health.

Other common signs of dampness include a musty smell, peeling paint or wallpaper, and the presence of mould spores.

Common Signs of Condensation

Condensation issues often manifest as black mould, particularly in areas with poor ventilation and high humidity, like bathrooms and kitchens. Water droplets on windows and other cold surfaces are telltale signs of mould condensation. These signs indicate that the air in the home is too moist, and steps need to be taken to improve ventilation and reduce humidity levels.

If your home has limited airflow, it may be susceptible to condensation problems. Ensuring proper ventilation, especially in areas prone to moisture buildup, can help mitigate these issues. Early identification and addressing of condensation signs can prevent further damage and health risks from mould growth. Condensation can often be mistaken for other forms of damp, especially when it forms near window frames or corners of rooms. Differentiating between them is essential to avoid wasting money on the wrong treatments.

Causes of Damp vs. Condensation

Understanding the causes of damp and condensation is crucial for resolution. Although both issues involve moisture, they have different sources. Damp typically results from external factors, such as rainwater leaking in, faulty plumbing, and inadequate drainage. On the other hand, condensation is mainly an internal problem. It arises from activities that raise indoor humidity. Insufficient ventilation contributes to this issue.

Mould damp occurs when mould thrives in damp, humid conditions caused by various forms of dampness. Addressing mould damp is essential to maintaining a healthy indoor environment.

Causes of Damp vs. Condensation

Causes of Damp

Damp is commonly caused by:

  • Rainwater ingress;
  • Defective plumbing;
  • Water leaks;
  • Poor drainage;
  • A damp patch.

These issues allow moisture to enter the building, leading to problems like rising damp and penetrating damp. Regular maintenance checks and prompt repairs of structural vulnerabilities can help prevent damp from becoming a severe issue.

Failed damp-proof courses are another significant cause of dampness, especially in older buildings. Proper drainage systems and maintaining gutters can also prevent water accumulation around the property, reducing the risk of damp issues.

Early identification and addressing of these causes can save homeowners from extensive and costly repairs.

Causes of Condensation

Condensation occurs when moist air meets cool surfaces, leading to moisture buildup. Common causes include inadequate ventilation, high-humidity areas like kitchens and bathrooms, and inadequate heating. Daily activities such as cooking, showering, and drying clothes indoors significantly contribute to humid air levels, exacerbating condensation problems.

To combat condensation, it’s essential to improve ventilation and ensure that the home is adequately heated. Installing extractor fans, using lids on pots while cooking, and drying clothes outside can help reduce moisture production and prevent condensation buildup.

Dealing with these causes helps maintain a healthier and more comfortable living environment.

How Damp and Condensation Affect Indoor Air Quality

The presence of damp and condensation doesn’t just damage your property; it also impacts indoor air quality. Moisture laden environments can encourage the growth of mould, bacteria, and dust mites, leading to respiratory issues and allergic reactions, especially in vulnerable individuals.

When moisture builds up on exterior walls, window frames, and behind doors, it reduces the circulation of fresh air and creates pockets of stagnant air where harmful contaminants can thrive.

Maintaining good indoor air quality requires identifying moisture problems early and addressing both the causes and the affected area properly.

How to Treat Damp and Condensation

Effective treatment of damp and condensation requires a clear understanding of their underlying causes and appropriate intervention methods. While DIY solutions can provide temporary relief, professional assessment and treatment are best for long-term resolution.

At Environ Property Services, we are experts in handling these issues and offer tailored solutions that address both the symptoms and root causes of damp and condensation.

Our professional services ensure effective treatment and help prevent recurrence by addressing structural vulnerabilities and improving ventilation.

Whether dealing with rising damp, penetrating damp, or persistent condensation, a comprehensive approach is essential for maintaining a healthy and damage-free home. A damp specialist can provide the expertise needed for these issues.

Treating Damp

To treat rising damp, consider the following methods:

  • Install a chemical damp proof course to prevent moisture from rising through the walls.
  • For penetrating damp, fix broken pipes and consider hiring a damp specialist for a thorough survey.
  • Install waterproofing membranes on affected external walls to prevent moisture ingress and protect the building’s structure.

Untreated damp can cause serious structural problems, such as dry rot and wet rot, making timely intervention crucial. Addressing damp problems promptly helps prevent extensive damage and mitigates health risks associated with mould and rot.

We will provide tailored solutions for your damp and/or condensation problems, focusing on effective and long-term strategies.

Treating Condensation

Improving ventilation is crucial for reducing condensation, as it helps remove moist air from the home. Installing extractor fans in kitchens and bathrooms can significantly decrease humidity levels, reducing the risk of condensation. Maintaining air circulation by leaving space between furniture and walls can also help prevent cold spots that lead to condensation.

Simple steps like keeping lids on pots while cooking and drying clothes outside can help manage indoor humidity levels. Nevertheless, if condensation problems are not resolved quickly, they can deteriorate plaster and other materials. Promptly addressing these issues ensures a healthier and more comfortable living environment.

How to Prevent Future Damp and Condensation Issues

Proactive measures and regular maintenance are required to prevent future issues with dampness and condensation. Regular inspections and appropriate maintenance can help identify potential problems before they become serious. Preventive steps help you maintain a dry and healthy living environment.

Preventing Damp

Maintaining consistent heating in all rooms can reduce cold spots, which are more prone to damp. Regularly opening windows helps moist air escape, which can prevent damp buildup. Avoiding overstuffing cupboards and ensuring furniture is not placed directly against walls can also promote air circulation and reduce the risk of damp.

Inspecting and maintaining pipes, drains, and gutters can help avoid leaks that contribute to damp conditions. Ventilating appliances like washing machines and tumble dryers externally prevent moisture from accumulating indoors. Ensuring your central heating runs at consistent levels during colder months can prevent temperature drops that lead to moisture problems. This, paired with proper insulation, creates an environment that’s less welcoming to damp.

By taking these preventive measures, you can significantly reduce the risk of damp issues.

Preventing Condensation

Maintaining a 50mm gap between furniture and external walls improves airflow and reduces the chances of damp and mould growth. Using pan lids while cooking reduces steam release, which can contribute to indoor humidity levels. Wiping down cold surfaces after moisture-generating activities helps prevent water accumulation and mould growth.

Preventing cold spots in a home can help reduce the likelihood of condensation and subsequent mould growth. Proper ventilation and maintaining indoor humidity levels are crucial steps in preventing condensation problems. By following these measures, you can create a healthier living environment and avoid the issues associated with condensation.

Get Lasting Protection from Damp and Condensation With Environ Property Services

At Environ Property Services, we understand how distressing damp issues can be for homeowners and business owners. Our dedicated team of damp specialists in London is here to provide you with effective solutions tailored to your unique needs. Whether you’re facing rising damp, penetrating damp, condensation or moisture problems, we are committed to restoring your peace of mind and safeguarding your property.

Our experienced professionals conduct meticulous surveys to identify the precise type of damp affecting your space. This thorough approach ensures that we apply the right treatments, effectively overcoming any damp-related challenges. With our expertise, we help create a safe and healthy environment for you and your loved ones.

We Offer Reliable Damp-Proofing Services

Trusting experts for your damp-proofing needs means you can focus on what truly matters—your home and family. At Environ Property Services, our damp proofing London services are designed with your long-term well-being in mind. We offer high-quality services backed by guarantees, ensuring that your property remains safe and sound for years to come. Our specialists approach every job with care and precision, treating each property as if it were our own. We invite you to experience the reassurance that comes from working with a team that truly cares about your comfort and security. Request a fast quote.

We Offer Reliable Damp-Proofing Services

Expertise You Can Trust for Historic Properties

Damp issues can be especially challenging for period properties and historic structures. Our team at Environ Property Services excels in handling these unique buildings, ensuring that we preserve their character while providing top-notch damp-proofing solutions. We blend our technical knowledge with an appreciation for history, allowing us to provide treatments that are both effective and respectful of the property’s heritage.

Our commitment to excellence, combined with our expertise in damp proofing, enables us to deliver reliable solutions for even the most challenging environments. Give yourself peace of mind knowing that your historic property is in capable hands. Contact us today for a consultation.

Common Mistakes Homeowners Make When Dealing With Damp and Condensation

One common mistake is relying solely on cosmetic fixes, such as repainting or applying a spray containing bleach to visible mould, without addressing the root causes behind the moisture. While such methods may temporarily remove black dots and staining, they do nothing to solve structural issues or stop future moisture build up.

Homeowners also often overlook the importance of insulation and proper central heating in preventing cold surfaces that cause condensation. A professional inspection can help differentiate between different forms of damp and suggest the right treatment, rather than relying on generic, ineffective solutions.

Frequently Asked Questions

What is the difference between rising damp and penetrating damp?

Rising damp is caused by moisture rising from the ground through the walls, usually due to a faulty or missing damp proof course. It is often identified by tide marks and damp patches on skirting boards. Penetrating damp, on the other hand, occurs when water enters the building through external walls, roofs, or floors, often as a result of broken roof tiles, leaking gutters, or cracks in the structure.

How can I prevent condensation damp?

To prevent condensation damp, ensure your home is well-ventilated by using extractor fans in kitchens and bathrooms, keeping window vents open, and avoiding drying clothes indoors. Maintaining consistent heating and using a dehumidifier can also help reduce humidity levels and prevent condensation from forming on cold surfaces.

What is the primary difference between damp and condensation?

The primary difference between damp and condensation is that damp arises from external moisture sources infiltrating the property. In contrast, condensation occurs when warm, moist air encounters cold surfaces inside the home.

What are the common signs of penetrating dampness?

Common signs of penetrating damp include water stains or discolouration on walls and ceilings, typically caused by leaky gutters or broken pipes. Addressing these issues promptly can prevent further damage.

How can I prevent condensation in my home?

To prevent condensation in your home, improve ventilation by using extractor fans and drying clothes outside to reduce indoor humidity levels. This will create a more comfortable living environment.

Why is it important to treat damp issues promptly?

Treating damp issues promptly is essential to prevent severe structural damage and health risks from mould exposure. Addressing these problems early can safeguard both your property and your well-being.

Conclusion

Understanding and addressing damp and condensation are pivotal in maintaining a healthy and structurally sound home. You can effectively mitigate these common issues by distinguishing between the two, recognising their signs, understanding their causes, and applying appropriate treatments. Regular maintenance and proactive measures are crucial in preventing future problems and ensuring that your living space remains dry and comfortable.

The expertise and tailored solutions we offer at Environ Property Services provide homeowners with professional support in managing damp and condensation issues.

Our commitment to preserving the integrity of properties, combined with advanced techniques and traditional craftsmanship, ensures long-term protection and peace of mind. So, take the necessary steps today to prevent extensive damage and promote a healthier living environment by contacting us right away. We are here for you.

Energy Efficiency Measures to Combat Damp

The Health Risk Of Damp In Homes: What You Need To Know – Environ Property Services

Damp in homes poses serious health risks and can significantly deteriorate indoor air quality. Specifically, the health risk of damp in homes ranges from respiratory problems like asthma and skin conditions to mental health issues.

In rare cases, prolonged exposure to damp and mould has resulted in tragic death, highlighting the seriousness of the health risk.

Understanding these risks is crucial for maintaining a safe and healthy living environment.

Key Takeaways

  • Damp in homes can be caused by rising damp, penetrating damp, and condensation damp, which are driven by factors like leaks, blocked gutters, and poor ventilation.
  • Living in damp environments poses significant health risks, including respiratory issues, skin conditions, and mental health problems, especially for vulnerable populations like children and the elderly. However, healthy people are generally less likely to experience severe health effects from damp and mould exposure.
  • Effective damp management requires a combination of adequate ventilation, prompt repairs of leaks and structural issues, and, if needed, professional damp-proofing services.

Damp and Its Causes

Damp in the home is the presence of excess or unwanted moisture within a building, which can lead to various issues over time. Damp and mould are persistent problems in homes and other indoor spaces, presenting serious health risks for occupants. According to the UK Health Security Agency, tackling damp and mould is essential to prevent a range of adverse health outcomes.

Moisture can infiltrate buildings from several sources. Leaks from damaged pipes, blocked gutters, and poorly maintained roofs are common culprits. Also, environmental factors such as heavy rainfall can exacerbate these issues, leading to significant moisture build-up. Water vapour from activities like cooking, bathing, and drying clothes indoors can accumulate and lead to condensation damp if not properly ventilated.

Poor ventilation can also trap humid air inside, further contributing to the problem. Energy efficiency measures, if not properly managed, can also contribute to developing damp by trapping moisture indoors.

Generally, the three most common types of damp are:

  • Rising damp occurs when moisture from the ground rises up through walls and floors.
  • Penetrating damp results from structural defects that allow water to seep through walls.
  • Condensation damp, which is usually caused by high indoor humidity.

Living in a damp environment can be uncomfortable and unhealthy. The musty smell and visible mould are just the beginning. Over time, damp can affect a building’s structural integrity, leading to costly repairs.

Understanding Damp and Its Causes

Health Risks Associated with Damp

Living in damp environments can lead to various health effects, including respiratory problems, skin irritation, and mental health issues.

The primary health hazard associated with damp conditions is mould, which can cause serious health issues. Mould spores thrive in damp conditions, leading to respiratory problems, skin irritation, and even potential toxicity. Common types of mould found in damp environments include Penicillium, Aspergillus, and Cladosporium.

Prolonged exposure to damp may also cause gastrointestinal problems such as nausea and diarrhoea. The general symptoms of ill health from damp environments include fatigue, which can severely impact daily life. Respiratory symptoms such as shortness of breath and coughing are a common complaint among individuals exposed to damp and mould.

The health risks associated with dampness are significant and should not be underestimated. Let’s examine specific health issues related to living in damp environments, starting with respiratory illnesses.

1: Respiratory Issues Due to Damp

Damp environments significantly increase the risk of respiratory diseases. Inhalation of mould spores is linked to respiratory infections and increased airway inflammation. Individuals with pre-existing conditions, such as cardiovascular disease, are at an increased risk of experiencing health issues related to damp and mould.

Mould and dampness are notorious for triggering allergic airway diseases like asthma and bronchitis. Allergic rhinitis, an inflammatory condition of the nasal passages, is also commonly triggered by exposure to mould and damp environments.

Common lung conditions associated with damp environments include asthma, chronic obstructive pulmonary disease (COPD), and other lung disorders. Other lung diseases, including cystic fibrosis, are also at increased risk of complications from mould exposure. Individuals with cystic fibrosis are particularly vulnerable to fungal infections such as aspergillosis due to mould exposure.

Symptoms of respiratory problems from damp conditions include difficulty breathing, chest tightness, coughing, and wheezing. These symptoms can sometimes be mistaken for the common cold, but may persist or worsen with ongoing exposure to damp.

Specific immuno-responses to allergens like Alternaria alternata, a common airborne mould found in damp environments, can worsen asthma symptoms in sensitive individuals.

Lower respiratory tract exposure in damp environments can cause cough, phlegm, wheeze, chest tightness, shortness of breath, and an allergic reaction. Additionally, damp conditions can cause symptoms like nasal congestion, sneezing, a runny or itchy nose, and throat irritation.

Living in damp homes can, therefore, be particularly hazardous for people with existing lung conditions. If airway inflammation persists for long periods, it can lead to permanent changes in the respiratory system. Mould exposure can have significant effects on the respiratory system, especially for those with pre-existing lung diseases.

2: Skin Conditions Linked to Damp

Damp environments can lead to various skin conditions, including eczema, fungal infections, and allergic reactions. Damp environments can also create a suitable environment for dust mites, which can lead to allergic reactions and exacerbate skin conditions. Individuals with existing skin issues, such as atopic eczema, are particularly sensitive to damp and mould.

Skin conditions like eczema can be exacerbated by damp conditions, which also lead to fungal infections. Allergic reactions triggered by mould can manifest as sneezing, a runny nose, red eyes, and skin rashes.

Touching mould spores or being in close contact with them can cause skin irritation and rashes. Toxic black mould, in particular, can lead to severe skin reactions if not addressed promptly.

Removing mould and preventing mould from returning is essential to avoid these health conditions. Maintaining a dry and well-ventilated home reduces the risk of skin irritation and other health problems.

Skin Conditions Linked to Damp

3: Mental Health Impacts of Living with Damp

The psychological stressors of living in damp homes can profoundly impact overall well-being. The stress and anxiety of living in a damp home can take a toll on both mental and physical health. Common mental health issues related to damp conditions include anxiety and depression, which can manifest as neuropsychiatric symptoms.

Stress from damp living conditions can result in unhealthy coping mechanisms, such as increased smoking and alcohol consumption. The constant worry about potential health impacts and concerns about property damage can take a toll on mental health. Promptly addressing damp issues can alleviate these psychological stressors and improve overall quality of life.

Vulnerable Populations at Greater Risk

Certain populations are at greater health risk from damp-related health issues, including:

  • Children
  • The elderly
  • Pregnant women
  • Individuals with weakened immune systems or existing health problems

Children, especially babies and toddlers, are most susceptible to respiratory conditions related to damp and mould. Individuals with severely weakened immune systems face significant health risks. They are particularly vulnerable to potentially fatal infections in the brain, heart, and kidneys after exposure to mould.

Prolonged exposure to damp environments can lead to adverse health outcomes, making it crucial to identify and address damp issues. By taking proactive measures, we can protect those most vulnerable and prevent tragic outcomes. Providing safe and healthy living conditions for all is a shared responsibility.

Legal Standards and Regulations

In the UK, damp and mould are especially common in the private rented sector, but they can affect any indoor space where moisture is not properly managed. The Housing Act and the Environmental Protection Act set out legal standards and regulations for landlords to follow in maintaining their properties and preventing damp and mould. The Housing Act requires landlords to ensure that their properties are free from hazards, including damp and mould, while the Environmental Protection Act enables local councils to take action against landlords who fail to address damp and mould issues.

Landlords must also comply with the Building Regulations, which include requirements for heating and ventilation systems to prevent excess moisture and mould growth. Failure to comply with these regulations can result in financial penalties and legal action. Additionally, the Tenant Act provides tenants with the right to report damp and mould issues to their landlord, who must then take prompt action to address the problem and prevent further adverse health effects.

Landlords have a legal obligation to maintain their properties in a condition that is safe and free from health hazards. This includes ensuring that heating and ventilation systems are adequate to prevent the build-up of excess moisture and mould growth. The Environmental Protection Act empowers local councils to intervene when landlords neglect their responsibilities, potentially leading to financial penalties and enforcement actions.

By adhering to these legal standards and regulations, landlords can provide safe and healthy living environments for their tenants, while tenants can feel confident in their right to a habitable home.

How to Prevent and Address Damp in Homes

Preventing and addressing dampness in homes requires a multi-faceted approach. One of the most effective ways to prevent damp and mould is to improve ventilation throughout the home. Enhancing ventilation is key to reducing damp and mould growth.

Taking proactive measures can effectively prevent mould. This includes using products to counteract mould and adopting good habits such as cooking with lids on and not drying clothes on radiators. Addressing leaks and moisture issues in the home is also crucial. This involves removing water-damaged or damp materials if they cannot be cleaned or completely dried, and proactively identifying moisture problems.

When removing mould, individuals should avoid contact with mould as much as possible, especially those in vulnerable groups, to reduce health risks. For larger mould areas or persistent damp issues, it is recommended that qualified professionals be consulted for comprehensive assessments and interventions.

Landlords must comply with legal requirements, including adherence to Building Regulations, when addressing damp problems to ensure safe living environments. Reducing mould exposure is essential for minimising health risks associated with damp environments.

Enhancing insulation to a minimum of 270mm in the loft can also help manage temperature and moisture levels more effectively. Let’s explore specific measures you can take to prevent and address damp in your home.

Effective Ventilation Systems

Proper ventilation systems are essential for removing moist air generated in kitchens and bathrooms, thereby preventing mould build-up. Condensation is a common issue that contributes to mould in bathrooms.

You can enhance ventilation and moisture control by using extractor fans, closing internal doors when cooking or showering, and drying laundry outdoors. Safety concerns and noise may prevent tenants from adequately ventilating their homes, but proper guidance can address these issues.

Operational ventilation systems in bathrooms are crucial for removing moist air from showering and bathing. An overhead cooker hood is also recommended for kitchen ventilation.

Extractor fans in kitchens should be installed close to the hob and linked to the outside or a central unit. Humidity-controlled fans are a beneficial option for landlords to improve kitchen ventilation.

Repair Leaks and Structural Issues

Promptly addressing leaks is crucial in preventing dampness in homes. Repairing leaks significantly reduces the risk of damp and mould in homes. This includes fixing leaking pipes, unblocking gutters, and ensuring that roofs and external walls are well-maintained. Repairing leaks leads to healthier living conditions by preventing mould growth.

Neglecting structural issues can lead to severe damp problems, affecting building materials and compromising your home’s integrity. Regular maintenance and timely repairs are essential to keeping your home dry and safe. Staying vigilant and addressing issues promptly can prevent the development of dampness and its associated health risks.

Importance of Professional Damp Proofing Solutions

Consulting professionals provide tailored solutions for effective damp proofing and moisture management. Consulting professionals is essential for effectively addressing a mould problem and ensuring long-term solutions. A professional damp survey is crucial for identifying damp sources and formulating targeted treatment plans.

Here at Environ Property Services, we offer comprehensive damp survey and damp proofing, ensuring that your home remains dry and protected.

Our professional damp-proofing solutions address both rising and penetrating damp, providing long-term protection against moisture issues. We also specialise in customised restoration methods that maintain the historical significance of buildings while effectively addressing damp issues.

The Role of Landlords and Tenants

As a landlord, it is your responsibility to address damp issues once tenants report them. This includes identifying the source of the dampness and carrying out the necessary repairs without placing any blame on the tenants. If landlords fail to address reported damp issues, they may face legal consequences and enforcement actions.

Tenants should promptly report any damp issues and should be assured that they will not be held responsible for dampness caused by the property’s conditions. Housing associations also play a crucial role in maintaining property standards and ensuring tenant health.

Both landlords and tenants have important roles in managing damp issues. By collaborating effectively, landlords and tenants can create safe and healthy living environments in rented accommodations.

Energy Efficiency Measures to Combat Damp

Energy-efficient homes are easier to heat and less prone to damp, provided ventilation is adequate. Government schemes are available to support private landlords in retrofitting their properties with energy-efficient technologies. Double glazing reduces heat loss by up to 50% compared to single glazing. The airtight seal in double-glazed windows helps minimise drafts and prevent condensation. Improving home insulation enhances energy efficiency and decreases the likelihood of damp. Investing in energy-efficient windows can lead to lower energy bills over time.

Better insulation reduces energy consumption and lowers the carbon footprint. Therefore, upgrading to modern double glazing significantly enhances home comfort by maintaining consistent indoor temperatures.

By adhering to these standards and taking advantage of available support, you can create healthier and more energy-efficient living environments that are less prone to excess moisture and damp.

Energy Efficiency Measures to Combat Damp

Environ Property Services: The Reliable Company for Lasting Damp Solutions

At Environ Property Services, we are dedicated to providing seamless and effective damp proofing London solutions tailored to your specific needs.

Our experienced team conducts thorough assessments and offers treatments that ensure the complete protection of your home against rising damp, penetrating damp, and condensation. You deserve a safe and healthy living environment, and we’re here to deliver just that.

Our commitment goes beyond just fixing damp problems; we aim to restore your peace of mind. With every service, we guarantee lasting results and quality craftsmanship so you can feel confident in the safety of your property. Trust us to handle your concerns with care and expertise, ensuring that we pay attention to every detail in the damp proofing process.

Experience That Matters for Every Property Type

When it comes to damp proofing, there’s no one-size-fits-all solution. Our skilled damp specialists are well-versed in the complexities of damp issues unique to period properties and historic structures. We appreciate the importance of preserving the architectural integrity of these homes while providing modern solutions to age-old problems.

With years of experience and a genuine passion for restoring and protecting your property, our team is equipped to tackle even the most challenging damp-related issues. We are committed to delivering high-quality, dependable services that exceed your expectations and keep your home safe for years to come.

Choose Environ Property Services for Lasting Peace of Mind

We offer reliable treatments and exceptional customer service, ensuring that your experience is as smooth and stress-free as possible.

Our clients trust us because we take the time to listen, assess, and tailor our services to fit their specific needs. Whether you’re facing rising damp or need specialist treatment for a historic property, we have the expertise to provide thorough, effective solutions tailored just for you.

Choose us for all your damp proofing needs, and join the many satisfied customers who have entrusted their homes to our capable hands. Request a fast quote today.

Frequently Asked Questions

What are the common types of damp in homes?

The common types of damp in homes are rising damp, penetrating damp, and condensation damp. Identifying visible signs of damp early can help prevent more serious issues. Each type stems from different sources: rising damp from groundwater, penetrating damp from structural defects, and condensation damp from high indoor humidity.

What health risks are associated with damp environments?

Damp environments pose significant health risks, including respiratory issues like asthma and bronchitis, skin irritation, and mental health problems. Addressing moisture in living spaces is crucial to mitigate these risks effectively.

What health problems can a damp house cause?

A damp house can trigger or worsen respiratory issues like asthma, sinus infections, and bronchitis. It may also cause coughing, skin irritation, and fatigue due to the growth of mould and bacteria in humid environments.

Is sleeping in a damp room bad for you?

Yes, sleeping in a damp room can negatively impact your health. Prolonged exposure to moisture and mould spores at night may lead to breathing difficulties, disturbed sleep, and allergic reactions.

How long does it take for damp to affect your health?

Health effects can appear within days or weeks, depending on exposure levels and individual sensitivity. Children, the elderly, and people with pre-existing conditions are especially vulnerable to rapid onset symptoms.

Does rising damp affect health?

Yes, rising damp can lead to mould growth and increased indoor humidity, both of which contribute to poor air quality and can cause respiratory illnesses and allergic reactions over time.

How can I prevent dampness in my home?

To prevent dampness in your home, ensure adequate ventilation, promptly fix any leaks, and consider professional damp proofing measures. Additionally, use extractor fans, keep internal doors closed during cooking or showering, and dry laundry outdoors to lower moisture levels.

What role do landlords and tenants play in addressing damp issues?

Landlords are obligated to repair damp issues upon notification and must adhere to legal standards for health safety. Landlords must ensure their properties are fit for human habitation, adhering to legal standards for health and safety. Tenants should report problems quickly to maintain a safe living environment. Collaboration between both parties is essential to effectively address damp concerns.

Conclusion

Damp in homes is a pervasive issue that can lead to serious health problems and structural damage if not addressed promptly. Understanding the causes of dampness, such as rising damp, penetrating damp, and condensation damp, is crucial for implementing effective solutions. The health risks associated with damp, including respiratory issues, skin conditions, and mental health impacts, highlight the importance of maintaining a dry and well-ventilated home.

Preventing and addressing damp involves a combination of effective ventilation, prompt repair of leaks and structural issues, and professional damp proofing solutions. Remember to choose Environ Property Services for comprehensive damp proofing and restoration services, ensuring that your home remains dry and protected. By taking proactive steps to address damp, you can protect your health and your property..

Dirty brick wall

How To Clean Brick Inside And Out – A Comprehensive Guide To Freshening Up Your Home

Brick, with its warm, inviting aesthetic, serves as a classic material in both interior and exterior home designs. 

However, maintaining its beauty requires regular care and cleaning, as brickwork can accumulate dirt, grime, and various stains over time. 

This guide provides everything you need to know about cleaning brick surfaces inside and out to restore their natural charm and ensure their longevity.

Understanding the Basics of Brick Cleaning

Why is it Essential to Clean Brick Walls?

Cleaning brick walls is essential not only for aesthetic reasons but also for the structural integrity of the brickwork. Dirt, moss, and mildew that accumulate on the surface of the brick can retain moisture, leading to damage over time. Regularly cleaning bricks helps prevent decay and keeps them looking their best, preserving the value of your home.

texture of old concrete wall abstract white grung 2023 11 30 22 46 06 utc

What Makes Bricks Get Dirty or Stained?

Bricks can get dirty and stained from a variety of sources. Exterior brick walls are exposed to the weather, leading to stains from rainwater, growth of moss and mildew, and accumulation of grime from air pollution.

Interior brick may accumulate soot, especially near fireplaces, and dust and dirt from general household activities. The type of brick and the local environment also play roles in how quickly and severely brick surfaces become stained.

The Difference Between Interior and Exterior Brick Cleaning

The primary difference in cleaning exterior versus interior brick lies in the exposure to elements and the type of soiling of each face.

Exterior brick walls contend with harsher conditions, requiring more robust methods like pressure washing for effective cleaning.

Interior brick, meanwhile, often needs gentler techniques to avoid damage to the bricks or mortar, focusing on removing soot or dust without introducing excessive moisture.

Preparing Your Bricks for Cleaning

Assess the Condition of Your Brickwork Before Cleaning

Before cleaning, closely examine the brickwork to determine its condition. Look for signs of damage or weakened mortar, which may be exacerbated by cleaning. 

Consider the age and type of brick, as historic or clay brick may require special care to prevent damage. Identifying these factors early can help you choose the most appropriate cleaning methods to protect your brickwork.

Gather the Right Tools and Materials for Brick Cleaning

For effective brick cleaning, gathering the correct tools and materials is crucial. Essential items include a bristle brush (or pressure washer for exterior brick), rubber gloves, protective eyewear, dish soap or a more potent cleaning solution like boric or muriatic acid for tougher stains, a sponge, and ample warm water. 

Always test cleaning solutions on a small area of the brick to ensure they do not cause damage.

Protect Surrounding Areas from Damage During Cleaning

When preparing to clean brick, especially exterior brick, it’s important to protect surrounding areas. Cover plants, ground, and nearby surfaces to shield them from potentially harsh cleaning solvents. 

Ensure windows are closed to prevent spray or runoff from entering your home. Taking these precautions can prevent unintended damage or additional cleaning tasks.

A Step-by-Step Guide to Cleaning Exterior Brick Surfaces

How to Remove Grime and Dirt from Exterior Brick Walls

To remove grime and dirt from exterior brick walls, start by saturating the bricks with a hose to loosen the dirt. 

Mix a simple cleaning solution of dish soap and warm water in a bucket. Using a bristle brush, scrub the brick surfaces in sections, working the soapy mixture into the bricks. Rinse thoroughly with water to prevent soap residue.

 For larger areas, consider using a pressure washer at a low setting to avoid damaging the brick.

Techniques for Tackling Tough Stains on Outdoor Brickwork

For tough stains on outdoor brickwork, such as moss or mildew, a stronger solution may be necessary.

Mixing diluted bleach with water in a spray bottle can effectively address these concerns. Spray the affected area, let the solution sit on the brick for a few minutes, then scrub with a bristle brush and rinse thoroughly.

For especially stubborn stains, muriatic acid diluted according to the manufacturer’s instructions can be used, but always with extreme caution and protective gear.

If you are dealing with paint stains, paint removal may require a specialised paint remover designed for brick surfaces. Choose the appropriate paint remover based on the type of paint, and always test in a small area first to avoid damage. Remember to wear gloves when handling strong cleaning agents or paint removers to protect your skin.

When and How to Use A Pressure Washer on Exterior Bricks

Using a pressure washer on exterior bricks is effective for removing built-up grime and stains. 

However, it should be used cautiously to avoid damaging the mortar or brick face. Always start with the lowest pressure setting, hold the washer at a distance, and use a sweeping motion. Test on a small, inconspicuous area first. 

Pressure washing once a year or as needed can keep your exterior walls looking fresh without causing harm.

Effective Methods for Cleaning Interior Brick Walls

constructor measuring brick wall near coworker wit 2023 11 27 05 35 04 utc

Dealing With Soot and Grime on Indoor Brick Surfaces

To clean grime on indoor brick surfaces, a milder approach is recommended. Mix a solution of dish soap and warm water, and use a sponge to apply it gently to the surface. For a natural alternative, white vinegar can be used to clean indoor brick and remove stubborn stains or efflorescence.

For tougher stains, a paste made from salt and detergent applied with a brush can provide a deeper clean without harsh chemicals. Always finish by rinsing with a damp cloth to remove any cleaning residue.

The Best Approach to Cleaning Painted Brick Indoors

For cleaning painted brick indoors, it’s crucial to avoid damaging the paint while removing dirt. Use a mild detergent mixed with water and a soft cloth or sponge to wipe down the surface gently. 

Avoid abrasive brushes or scrubbers that could scratch or peel the paint. Regular dusting can prevent buildup and make deeper cleaning less frequently necessary.

Natural Solutions for Refreshing Your Interior Brickwork

Natural cleaning solutions, such as a vinegar and water mixture, can effectively clean interior brick without introducing harsh chemicals into your home. 

Spray the brick lightly with the solution, then use a brush to scrub the surface lightly. Rinse with a clean, damp cloth to remove any vinegar residue. 

This method is perfect for maintaining the natural look of the brick while ensuring it stays clean and fresh.

Historic Home Brick Cleaning Considerations

Special Care for Older Brickwork

Cleaning brickwork in historic homes requires a gentle touch and a thoughtful approach. Older clay brickwork, often found in period properties, is more porous and can be easily damaged by harsh chemicals or aggressive cleaning methods. Before starting any brick cleaning, carefully assess the condition of your interior brick and exterior brick walls. Look for signs of crumbling mortar, cracks, or weakened bricks—these areas need extra caution to avoid further deterioration.

For cleaning interior bricks in historic homes, opt for mild dish soap mixed with warm water and applied with a soft-bristled brush or a damp cloth. This gentle cleaning solution helps lift dirt and grime without compromising the brick’s appearance or structural integrity. Avoid using a pressure washer on exterior brick, as the force can erode the brick face or dislodge old mortar. Instead, use a stiff brush and a suitable cleaning solution, working slowly to remove surface stains and accumulated dirt.

If you’re unsure about the best approach, consult a professional with experience in historic brick cleaning and restoration.

Restore Your Brick With Environ Property Services – London’s #1 Choice for Expert Brick Cleaning

At Environ Property Services, we clean and restore bricks to elevate curb appeal and protect the integrity of your property. With decades of hands-on experience and a deep understanding of London’s unique architecture, we have become the trusted name in professional brick cleaning in London.

Our specialists apply precision techniques tailored to each surface. From low-pressure ThermaTech steam cleaning to specialist stain removal, we guarantee a thorough, safe, and stunning result. We treat every building with respect, care, and attention to the smallest detail.

Our process begins with a detailed survey to assess your brickwork, identify underlying issues, and recommend the ideal approach. Whether you are a homeowner, landlord, or restoring a listed heritage building, we adapt our methods to fit your structure’s age, material, and condition.

From your first phone call to the final rinse, you will experience professionalism, transparency, and unmatched expertise. Don’t risk the damage and frustration of DIY shortcuts. Call us today on 020 4572 5564 or request a callback to restore your brickwork safely, expertly, and affordably.

Maintaining Your Brick Walls: Tips and Tricks for Longevity

Preventive Measures to Keep Your Bricks Clean Longer

Preventative measures are key to keeping bricks clean longer. Seal exterior brickwork to protect against moisture and stains, and ensure gutters and downspouts are clear to prevent water damage. 

Inside, regular dusting can minimise the accumulation of dirt and grime on exposed brick surfaces.

Repair Mortar and Addressing Moisture Issues

Repairing damaged mortar and addressing any moisture issues are essential steps in maintaining the integrity and appearance of brick walls. 

Tuckpointing — the process of removing and replacing damaged mortar — can prevent further deterioration and improve the wall’s resistance to moisture. 

Ensuring proper drainage around the home also helps protect exterior brick walls from water damage.

Schedule Regular Brick Maintenance

Establishing a regular maintenance schedule for brick walls can prevent the need for extensive cleaning and repairs. 

This includes annual inspections to identify potential issues, routine cleaning of both interior and exterior brick surfaces, and immediate attention to any damage detected. 

By dedicating time to maintaining your brick walls, you ensure their beauty and structural integrity for years to come.

Professional Brick Cleaning VS DIY Brick Cleaning  

The porous nature and exposure of bricks to environmental elements mean it requires regular attention to maintain its appeal. Whether it’s the exterior facade facing the brunt of the weather or interior walls gathering dust and soot, each surface demands a tailored approach to cleaning. This necessity raises a question: should you embark on this journey alone or seek the expertise of professional Brick cleaning services in London?

The answer lies in understanding the stakes. DIY brick cleaning, while initially seeming cost-effective, often overlooks the nuances of brick care, risking damage to both the brick and mortar through improper techniques or harsh chemicals.

Professional services, on the other hand, bring a wealth of experience, ensuring that every pore and crevice is treated with the respect it deserves without compromising the brick’s integrity or your home’s aesthetic. Moreover, the use of environmentally friendly and technologically advanced systems like ThermaTech not only guarantees a deeper clean but does so with the utmost respect for the environment and the longevity of your brickwork.

In choosing a professional path, you’re not just cleaning your brick; you’re investing in your home’s future, ensuring that its beauty and strength stand the test of time.

Frequently Asked Questions

How can I effectively clean the brick outdoors to remove moss and dirt?

To clean outdoor brick effectively, especially when dealing with moss and dirt, start by using a stiff brush to scrub the surface. For moss buildup, a solution of boric acid and water can be particularly effective. Apply the solution to the moss-covered areas and let it sit for at least 30 minutes before scrubbing with a stiff brush.

For general dirt and grime, mix a gallon of warm water with dish soap and use a scrub brush to clean the surface. Always rinse the brick thoroughly with water after cleaning to remove any residual cleaning solution.

What’s the best way to clean interior brick to preserve its natural look?

To clean interior brick while preserving its natural look, start by gently dusting to remove loose dirt. Then, mix mild dish soap with warm water and gently scrub the surface with a soft brush to clean the brickwork without damaging it.

Avoid using harsh chemicals or abrasive tools that can erode the brick-and-mortar. Rinse the brick with a clean rag dampened in clean water, and let the brick air dry completely. For stubborn stains, a paste made of dish soap and salt can be applied before scrubbing.

Can I use a pressure washer to clean the brickwork outside my historic home?

While a pressure washer can be an effective tool for exterior cleaning of brickwork, caution is advised, especially with historic homes. The intense pressure can damage the brick and mortar if not used correctly.

It’s essential to use a low-pressure setting and hold the nozzle at least 12 inches away from the surface. Before using a pressure washer, test it on a small, inconspicuous area. For best results, consider consulting our professionals with experience in cleaning historical buildings.

How do I remove heavy mortar stains from brick, both inside and outside?

To remove heavy mortar stains from brick, whether inside or outside, create a cleaning solution by mixing one part muriatic acid with ten parts water. Apply the solution to the stained area using a brush, let the acid work for 5 to 10 minutes, and then scrub vigorously with a stiff brush. Always wear protective gear, such as gloves and goggles, when working with acid solutions.

Rinse the brick thoroughly with water after cleaning. If stains persist, it may be necessary to repeat the process or seek professional help.

Are there any natural cleaning solutions for both indoor and outdoor brick cleaning?

Yes, there are natural cleaning solutions that can be used for both indoor and outdoor brick cleaning. A popular homemade solution includes mixing equal parts of water and vinegar, which is effective in removing light dirt and stains.

For tougher stains, a paste made from baking soda and water can be applied to the affected area before scrubbing. These natural solutions are gentler on the brick-and-mortar and are environmentally friendly options for home improvement projects.

How often should brickwork be cleaned to maintain its appearance?

The frequency of brickwork cleaning largely depends on its location and exposure to elements. Generally, outdoor brickwork should be inspected and cleaned every 1 to 2 years to remove built-up dirt, stains, and biological growth such as moss or algae.

Interior brick may require less frequent cleaning, typically every 2 to 3 years, depending on the level of dust and indoor pollutants. Regular inspections can help identify when cleaning is necessary to maintain the brick’s appearance and integrity.

Can I use a wire brush to remove stains from porous brick caused by cement staining?

Yes, a wire brush combined with a quality brick cleaner can effectively remove stains from cement staining. However, since porous brick requires care, this method works best on durable surfaces needing little maintenance.

TOP BRICK CLEANING TECHNIQUES

Effortless Brick Stain Removal: A Step-by-Step Guide For Pristine Surfaces

Brick stain removal can seem daunting. In this article, we will show you how to identify various stains and the exact steps to get rid of them effectively.

Key Takeaways

  • Identifying the type of brick stain, such as efflorescence, vanadium salts, or paint, is crucial for selecting the most effective and safe cleaning method to prevent damage to the brickwork.
  • Using appropriate tools and techniques, like a nylon brush and gentle cleaning solutions, helps remove brick stains while taking care to avoid damage to the mortar joints or the bricks themselves, especially when dealing with delicate historical structures.
  • Preventative measures for brick care, including good building design and using barriers and sealers, are essential for protecting brickwork from water penetration, organic growth, and long-term degradation.

Understanding Brick Stain Challenges

Brick surfaces, whether they form the facade of a historical building or the exterior of a modern home, are constantly exposed to natural and human-made elements. From airborne soot and dirt to accidental spills, numerous agents can tarnish the clean brickwork of facing bricks.

Moisture and water exposure are major contributors to the formation of stains on brickwork, as they can carry impurities and promote discoloration, especially when combined with environmental pollutants.

Choosing an appropriate cleaning technique can be tricky. Factors like the purpose of cleaning and the brickwork’s location of the brickwork can influence the choice of the most effective stain-removal method. It’s not as simple as grabbing a brick cleaner and scrubbing away.

Different stains and brick type require different approaches, necessitating a more nuanced understanding of the stain’s origin. Cleaning clay brickwork requires special care and techniques to preserve the integrity of clay brickwork, as improper methods can cause damage.

Conditions that foster organic growth escalate the complexity. Moss, algae, and lichens flourish in damp, cold, and shaded environments. Shaded areas and persistent moisture are especially problematic for organic growth, as they encourage the development of greenish stains and contribute to the degradation of brick surfaces over time. So, it’s not just about keeping your bricks clean; it’s also about maintaining the conditions that keep them clean.

Types of Brick Stains

Before effectively cleaning your brickwork, you must identify the type of stain you’re dealing with. Stains on brickwork can include efflorescence, organic growth like moss or algae, and construction-related stains.

One common cause of discolouration is efflorescence, characterised by white stains or white marks on brick surfaces. These are salt and mineral deposits left behind when water evaporates from the brickwork.

Lime staining is another issue that appears similar to efflorescence but is caused by calcium compounds leaching from mortar or concrete, resulting in white, dribbling marks that require different treatment.

Other stains can be more insidious, causing structural damage over time. Green or yellowish-green staining, often referred to as green stains, frequently results from vanadium salts or other metallic elements, while brown or red stains are primarily due to manganese oxide. Manganese stains can occur when manganese dioxide, used as a colouring agent in brick manufacturing, dissolves in water and causes dark discolouration. These types of stains are examples of metallic staining, which includes stains from iron, manganese, and vanadium. Metallic staining can lead to acidity-related brick damage, making them particularly challenging to remove.

Paint stains are also a common issue, especially in urban areas. Aerosol paints, among others, can be particularly difficult to remove from bricks, requiring special treatment based on the paint’s chemical composition. Identifying the stain type enables you to choose the most effective paint removal method, which saves time and prevents avoidable harm to your bricks. Using a suitable paint remover can make removing paint more accessible and efficient.

Additionally, cement residues from construction can also cause persistent stains on brickwork that require specialised cleaning techniques.

The Right Tools for Brick Stain Removal

Once you’ve identified the type of stain, you must choose the right tools for the job. When cleaning brickwork, using non-abrasive tools and gentle cleaning methods is crucial to prevent damage to the brick surfaces and mortar joints.

One recommended tool is a nylon brush, which can be used with a detergent solution to remove dirt and grime effectively. However, you should avoid using a wire brush or metal tools, which can be too abrasive for brick surfaces. For removing larger deposits of cement or mortar, wooden tools are recommended, as they allow you to clear away residue without damaging the brickwork.

While using a high-pressure washer might be tempting, avoiding such aggressive cleaning techniques is essential. High-pressure washing can damage brick surfaces and mortar joints, underscoring the need for gentler methods like soft nylon brushing with warm water.

Selecting appropriate tools and protective gear helps maintain your clay brickwork’s structural and aesthetic integrity.

Brick Stain Removal Safety Precautions

When tackling brick stains, prioritising safety is essential for both you and your brick surfaces. Always start by wearing protective gear—gloves, safety glasses, and a mask—to shield yourself from cleaning chemicals and airborne particles. If you’re using any chemical cleaning solutions, make sure the area is well-ventilated to avoid inhaling fumes.

Before applying any cleaner to your brickwork, test it on a small, hidden area to ensure it won’t damage the brick or mortar. This simple step can prevent unwanted discolouration or surface erosion. Avoid using high-pressure washing, as it can erode the brick surfaces and mortar joints, leading to long-term damage.

Carefully follow the manufacturer’s instructions for any cleaning products or chemicals, and never mix different cleaners unless specifically directed. For particularly stubborn stains or if you’re unsure about the process, it’s wise to consult a specialist brickwork cleaning contractor. Their expertise can help you avoid damaging your brickwork and ensure the stain removal process is both safe and effective.

Step-by-Step Guide to Removing Common Brick Stains

Now that we’ve established the challenges and tools necessary for cleaning brickwork, let’s move to the heart of the matter: how to remove common brick stains. Each type of stain, whether on old or new brickwork, requires specific techniques for effective removal, with old brickwork needing especially gentle cleaning methods to preserve its integrity and character.

How Do I Remove Efflorescence from Bricks?

Removing efflorescence typically involves gently scrubbing the affected area with a suitable brush to lift and eliminate the salt deposits. Efflorescence can be removed using gentle methods such as spraying the walls to simulate rain or dabbing with a damp sponge frequently rinsed in clean water.

For more stubborn deposits, scrub the area gently to avoid damaging the brickwork. This process helps dissolve and wash away the soluble salts, leaving your bricks clean and bright.

Yet, merely removing the efflorescence does not suffice. Addressing the issue of water penetration in brickwork is imperative for preventing its recurrence. Efflorescence occurs when water evaporates through surfaces and leaves behind salts and minerals. Characterised by a white powdery ‘bloom’ or mark on the surface of certain brick types like clay bricks, efflorescence results from soluble salts being brought to the surface.

By addressing the root cause, you can ensure long-term protection against efflorescence.

How Do I Remove Hard Water Stains from Bricks?

To remove hard water stains, make a solution of equal parts white vinegar and water. This solution helps dissolve and remove stains, restoring the clean appearance of your bricks.

Stubborn hard water stains may require an acid solution, such as muriatic acid, to tackle those stubborn stains. Hydrochloric acid is another acid sometimes used for stubborn hard water or lime staining, but it must be used with extreme caution. Nonetheless, you should first test this on a small area to ensure it doesn’t harm the brickwork. With the right approach, hard water stains can be effectively removed, leaving your bricks looking as good as new.

Hard water stains are often caused by calcium hydroxide reacting with carbon dioxide in the air to form calcium carbonate, leading to salt deposits on the brick surface.

How Do I Remove Organic Growth from Bricks?

To remove organic growth from an exterior brick wall, both physical removal and chemical treatment are often necessary.

To eradicate these organic growths, follow these steps:

  1. Start by mechanically removing loose organic matter from the brickwork.
  2. Once the loose matter is removed, apply an alkaline brick cleaner or surface biocide.
  3. This treatment can effectively kill and prevent the remaining organic growth from returning.

It’s important to note that biocide is most effective when applied during drier weather to avoid dilution. Also, before applying biocide to brickwork, it’s crucial to test a small, inconspicuous area first and strictly follow the manufacturer’s instructions. By taking these precautions, you can ensure the safe and effective treatment of organic growth on your bricks.

Special Considerations for Cleaning Interior Brick Surfaces

Interior brick surfaces require a gentle touch to preserve their appearance and structural integrity. Unlike exterior brick walls, interior brickwork is more susceptible to dust, dirt, and stubborn stains due to limited exposure to natural cleaning elements like rain. When cleaning interior bricks, avoid harsh chemicals and high-pressure washing, as these can damage the brick and mortar.

Instead, opt for a soft cleaning method—use a damp sponge or a soft-bristled brush to gently lift dirt and grime from the surface. For more persistent stains, a specialised brick cleaner designed for interior use can be effective. Always protect nearby floors and furniture from splashes or debris by covering them before you begin cleaning.

Regular maintenance, such as dusting and occasional gentle cleaning, will help prevent stains from setting in and keep your interior brickwork looking its best. If you encounter particularly stubborn stains, consider seeking professional advice to ensure the cleaning method is safe for your specific brick surfaces.

Advanced Brick Stain Removal Techniques

Some brick stains require more advanced removal techniques, especially when dealing with persistent issues like mortar stains, metallic stains, or vanadium stains. For these challenging stains, specialised cleaning solutions such as brick acid or muriatic acid can be effective in breaking down and removing deposits. When using these acids, always dilute them according to the manufacturer’s instructions and apply them carefully to avoid damaging the brickwork or mortar.

For metallic stains, such as those caused by manganese or vanadium, a diluted oxalic acid solution can help lift the discolouration from the brick surface. In some cases, gently spraying the area with water before applying the cleaning solution can enhance its effectiveness and help remove efflorescence or other stubborn stains.

Because these advanced techniques involve strong chemicals and precise application, it’s best to consult a specialist brickwork cleaning contractor. Their expertise ensures that the cleaning process is safe, effective, and tailored to the specific type of stain and brickwork involved.

Specialised Cleaning for Historical Buildings

Historical buildings require a different level of care when cleaning brickwork. Their age and architectural significance necessitate milder cleaning methods to prevent damage.

Hand washing with a soft-bristled brush and mild detergent is recommended for historical buildings. This gentle method can effectively remove dirt and grime without damaging the older bricks and mortar. In cases of mould, mildew, or moss on the shaded exterior walls, a cleaning solution of one cup of bleach in a gallon of water can be used.

Before initiating any cleaning process, a specialist brickwork cleaning contractor should conduct a thorough survey to avoid any potential damage to the historic building. Environ Property Services offers specialised expertise in heritage building restoration, including stone wall restoration, brick repointing, and period roofing repairs.

Common Mistakes to Avoid in Brick Stain Removal

When removing stains from brick surfaces, avoiding common mistakes is key to preserving both the appearance and structural integrity of your brickwork.

One frequent error is using harsh chemicals or high-pressure washing, which can erode the brick and mortar, leading to costly repairs. Always test any cleaning solution on a small, hidden area before applying it to the entire surface to prevent unexpected damage or discolouration.

Neglecting to wear protective gear, such as gloves and safety glasses, can put your health at risk during the cleaning process. Another common oversight is not following the manufacturer’s instructions for cleaning products, which can result in ineffective stain removal or even further staining.

It’s also important to address the root cause of the stain—such as water penetration or organic growth—rather than just treating the surface. Failing to do so can lead to recurring stains and ongoing maintenance issues. By taking a careful, informed approach and avoiding these pitfalls, you can ensure your brick surfaces remain clean, attractive, and structurally sound for years to come.

Preventative Measures for Long-Term Brick Care

Maintaining clean bricks involves removing stains and preventing them from occurring in the first place. You can ensure long-term care for your brickwork by taking certain preventative measures.

Good building design is pivotal in this regard. Features like eaves and overhangs can curtail rainwater penetration, whereas an apt landscape design ensures sufficient runoff. These measures are essential in preventing water-related stains and associated algae growth.

Additionally, using vapour barriers and permeable geotextiles during masonry construction can prevent groundwater entry and salt absorption, enhancing protection against efflorescence and other water-induced damage. Post-cleaning, applying hydrophobic sealers can provide long-term defence against water and salt ingress, effectively preventing efflorescence and other common stains.

Environ Property Services: Your Partner in Brick Restoration

When it comes to brick restoration, you need a trustworthy partner. Environ Property Services is that partner. Our team of property experts, with decades of experience, specialises in repairing, restoring, and refurbishing London’s diverse architectural heritage.

At Environ Property Services, we offer comprehensive brick restoration services, including thorough cleaning and precise brickwork repointing. Our commitment to preserving properties’ historical significance and beauty while employing modern conservation practices sets them apart in the industry.

What truly sets Environ Property Services apart is our commitment to customer satisfaction. We offer friendly service and deliver meticulously detailed work that ensures cost-effectiveness and longevity for our clients. With Environ Property Services, you can trust that your brickwork is in good hands.

Summary

Brick stain removal is a complex process requiring a nuanced understanding of different stain types, the right tools and techniques for removal, and effective preventative measures for long-term care. Whether you’re dealing with a historical building or a modern home, maintaining clean bricks is crucial for your property’s aesthetic appeal and structural integrity.

With the right approach and a trusted partner like Environ Property Services, you can restore your brickwork to its pristine glory and ensure its longevity for years.

Frequently Asked Questions

What causes brick stains?

Brick stains can be caused by airborne soot, dirt, water penetration, organic growth, and chemical reactions. These factors lead to issues like efflorescence and hard water stains on the bricks.

How can I remove efflorescence from bricks?

To remove efflorescence from bricks, gently spray the walls or dab with a damp sponge and rinse frequently in clean water. Addressing water penetration issues is important to prevent efflorescence from coming back.

Are there specific tools I should use for brick stain removal?

To prevent damage to brick surfaces and mortar joints, use non-abrasive tools like nylon brushes and gentle cleaning methods. Avoid high-pressure washing and wire brushes.

How can I prevent brick stains?

To prevent brick stains, ensure proper storage and handling of bricks, design buildings to minimise water penetration, and use vapour barriers and hydrophobic sealers to prevent water and salt ingress.

What services does Environ Property Services offer for brick restoration?

Environ Property Services offers comprehensive brick restoration services, such as cleaning and repointing of brickwork and specialist services for heritage building restoration.

How to identify dry rot and wet rot

How To Identify Dry Rot And Wet Rot

Timber is used throughout houses and buildings to help create the structure of the property; however, it is a vulnerable material that needs to be protected. One of the main threats you need to keep an eye out for is wet and dry rot. This guide will show you how to identify dry rot and wet rot and let you know a bit about treating them. Both wet and dry rot are forms of fungal decay that can cause structural damage to buildings. Dry rot is the most serious form of wood rot and can cause the most damage, spreading across your property and destroying the timber. Wet rot is less serious but more common, this will be confined to the area where the wood is damp. If you suspect you have either, you should consult with a wet or dry rot control company.

What is Wood Rot?

Wood rot is a serious issue that affects many properties, compromising both the appearance and the structural integrity of buildings. At its core, wood rot is a form of fungal decay that targets timber, breaking down the wood fibres and weakening the material. There are two main types of wood rot to be aware of: wet rot and dry rot. Wet rot refers to a group of fungi that thrive in persistently damp conditions, often caused by leaks or poor ventilation. Dry rot, on the other hand, is a specific and more aggressive fungus that can spread rapidly, even through masonry, causing extensive damage. Recognising the differences between wet rot and dry rot is essential for effective rot treatment and for protecting your property from further harm. By understanding how these types of rot develop and spread, you can take the right steps to prevent fungal decay and maintain the safety and value of your home.

How Can I Identify Wet Rot?

To identify wet rot, look out for the following signs:
  • Black fungus on timber
  • Timber that feels wet and spongy and that looks discoloured
  • The paint finish is damaged, although this is not the case in all instances
  • Flaky paint
Wet rot can often be found in areas such as window frames, where moisture can easily penetrate and affect the timber. Wet rot is caused by Coniophora puteana (cellar fungus) and Fibroporia vaillantii (mine fungus), which are common species responsible for this decay in damp environments. The presence of wet rot fungus leads to the rotting of timber, often accompanied by a distinctive, damp, musty smell, which is a key indicator of moisture problems and timber decay.

How Can I Identify Dry Rot Affected Wood?

One of the first signs to look out for is a distinctive musty smell, often described as damp and earthy, which can linger around affected timber. As dry rot progresses, the wood may develop a lemon-yellowish tinge and become dry, brittle, and cracked. You might also notice cotton wool-like fungal growth on the surface, which is a clear indicator of dry rot fungus at work. Unlike wet rot, dry rot can spread rapidly, moving beyond the initial area and causing widespread damage if left untreated. Early identification is crucial—catching dry rot in its early stages can prevent the fungus from compromising the structural integrity of your property and help you avoid more extensive repairs down the line. Spotting dry rot early can save you from costly repairs and major structural damage.

Signs of Dry Rot Spread

Before we look at the list, it’s important to note that the signs of dry rot can often be hidden or subtle. Inspecting for these signs of dry rot is crucial, as symptoms may not always be immediately visible.
  • The fungus will create deep cracks that run across the grain
  • You might see white sheets (also known as mycelium growth) across the wood
  • When exposed to light, the fungus will look lemon-yellow
  • The timber will look brown in colour, and it will crumble easily, as the dry rot is feeding on the timber. This affected wood, often the wood affected by brown rot fungi, shows a brittle texture and a darker shade compared to healthy timber.
  • You may notice a distinctive dry rot smell, which can vary depending on the extent of the decay and the type of wood affected.
  • If the floor feels bouncy, creaks, or sags, this can be a sign that dry rot has compromised the structural integrity of the flooring.
  • Although the dry rot will usually be restricted to the timber, in some cases flat mushroom-like bodies, known as fruiting bodies or a fruiting body, can grow through finishes such as plaster/ paint, releasing spores to spread the fungus further.

What Are the Differences Between Dry Rot and Wet Rot?

Understanding the differences between dry rot and wet rot is key to effective rot treatment and prevention. The primary distinction lies in the moisture content required for each type of fungal decay to thrive. Wet rot fungi need a high moisture content—typically around 50%—to grow, so they are usually found in areas with persistent damp, such as around leaking pipes or poorly ventilated spaces. Dry rot, however, can develop in timber with a moisture content of around 20%, making it a threat even in less obviously damp conditions. Dry rot is also more aggressive, capable of spreading rapidly across structural timbers and even through masonry, leading to significant damage. In contrast, wet rot tends to remain confined to the area of damp timber and does not spread as quickly. Recognising these differences helps you identify the type of rot affecting your property and choose the most effective treatment to protect your home from further fungal decay.

How Can I Get Rid of Dry And Wet Rot (Wet & Dry Rot Treatment)

Effective wet or dry rot control begins with removing the source of moisture that created the condition for rot and fungal growth in the first place; this might involve mould control. The next step is removing plaster and timber that is infected with the rot and spores, following with fungicide treatment and fixing any structural integrity issues. This could involve timber replacement. If you would like to speak to our dry rot control company in London, get in touch for a consultation.

Environ Property Services Damp & Structural Restoration Solutions

Dampness, leaks, and structural wood damage can quickly grow into serious problems: rotten wood, weakened foundations, and widespread fungal decay. At Environ Property Services, we offer comprehensive restoration service that tackles the root of the issue and not just the visible symptoms. Our team can expertly integrate damp-proofing, and structural restoration to deliver a robust solution that secures your property both now and for the future. Our approach begins with a thorough damp survey, identifying whether rising damp, penetrating damp, or condensation is at play. We follow with a tailored treatment solution. This comprehensive strategy ensures no moisture or fungal attack goes unchecked. As a family run business in London, Environ Property Services is grounded in integrity and renowned for quality and trust. We restore structural dignity and resilience. Choose Environ Property Services today and benefit from our decades of expertise in property preservation in London.

How to Prevent Wood Rot

Preventing wood rot starts with proactive maintenance and regular inspections of your property’s timber. Addressing sources of damp—such as penetrating damp, defective plumbing, or poor ventilation—is essential to keep moisture content in check and stop fungal decay before it starts. Ensuring good airflow throughout your home helps timber stay dry and less susceptible to both wet rot and dry rot. Regularly checking for early signs of rot, such as discolouration or a musty smell, allows you to catch problems before they escalate into major structural damage. If you do find affected timber, it’s important to act quickly: remove the source of moisture, replace or treat the damaged wood, and apply appropriate fungicidal treatments. By staying vigilant and maintaining your property, you can significantly reduce the risk of wet rot and dry rot, protecting your home’s structural integrity for years to come.

Health Risks

Wood rot is not just a threat to your property—it can also pose health risks, especially for those with respiratory conditions. The spores released by fungal decay, including both wet rot and dry rot, can aggravate asthma and other breathing problems. The persistent musty smell that often accompanies wood rot can make living spaces uncomfortable and may indicate the presence of airborne fungal spores. In severe cases, untreated wood rot can lead to major structural problems, making a building unsafe for occupation. Promptly addressing any signs of rot and maintaining a dry, well-ventilated environment can help protect both your health and your home. Regular inspections and timely repairs are key to preventing the spread of rot and the associated health risks.

The Serious Consequences of Leaving Wood Rot Untreated

If left untreated, wet rot can spread extensively through your property’s timber, weakening its structural integrity and causing parts like skirting boards and flooring to deteriorate. Untreated wet rot thrives in areas with enough moisture, gradually breaking down the wood fibers and causing it to feel soft, damp, or brittle to the touch. Over time, wet rot growth may lead to sagging floors, warped door frames, and the need for costly repairs. If you don’t treat wet rot, it may create the perfect environment for a dry rot outbreak, which is far more aggressive and destructive. A dry rot outbreak introduces additional dangers, as dry rot spores can travel through air and even penetrate brickwork, seeking out infected timbers to feed on. This leads to rotten wood in previously unaffected areas and a rapid increase in structural damage. Ignoring wet rot problems can give rise to extensive wood destroying fungi, releasing spore dust into your living space, which could pose health risks. Whether it’s dry rot or wet rot, the decay won’t stop on its own. You’ll need to treat it effectively. A wood hardener may help.

Conclusion

Wet rot and dry rot are more than just surface-level issues; they are destructive forms of wood decay caused by excess moisture and fungal growth that can seriously compromise the structure and safety of your home. Knowing how to identify early signs like discoloured, soft, or cracked timber, a musty smell, or visible fungal growth can make all the difference. By acting quickly to treat wet rot or treat dry rot, you not only stop the spread of these wood destroying fungi but also save yourself from costly repairs and potential health risks. Early prevention is key, whether it’s replacing infected timbers, improving ventilation, or removing the source of excess moisture. If you suspect a problem, don’t delay getting expert help.

FREQUENTLY ASKED QUESTIONS

Telling the difference between wet rot and dry rot begins with observing the condition of the wood. Wet rot typically causes timber to feel soft, spongy, or damp to the touch and may appear darker or show signs of flaking paint.

It usually stays localised in areas with excess moisture. Dry rot, on the other hand, is more aggressive and causes the wood to become dry, brittle, and cracked. You may also notice cotton wool-like fungal growth or a strong musty smell.

The “roots” of rot refer to the fungal strands, also known as hyphae or mycelium. Wet rot usually doesn’t produce extensive root-like growth because it remains confined to moist areas.

Dry rot roots are far more invasive, appearing as thick white strands that can penetrate plaster, bricks, and hidden timber.

This is what makes dry rot outbreaks particularly dangerous, as the fungus can travel away from the original moisture source.

Yes, there are practical ways to test for dry rot. A common approach is gently prodding the wood with a screwdriver. When you do this, a dry rot-infected timber will crumble or break easily due to its brittleness.

You can also look for mycelium growth, spore dust, or fruiting bodies. Professional inspectors may use moisture meters or infrared imaging to detect hidden moisture levels and dry rot activity within walls or under flooring, especially if dry rot is suspected in hard-to-reach areas.

Dry rot causes the wood to shrink, darken, crack, and crumble easily. You will also notice fungal growth or a musty smell nearby. Termite damage, on the other hand, often appears as hollowed-out wood with visible tunnels, sometimes lined with mud.

You may find discarded wings or small piles of termite droppings near affected areas. If you are unsure, it’s wise to contact a specialist, as treatment for dry rot and termite infestations requires different approaches.

Yes, roofers increasingly use drones to complete roof inspections. Drone roof inspections save time because they don’t require scaffolding, ladders, or roofers to physically climb onto the top of the roof. This means the process is also safer. Moreover, high-tech drones can identify roofing problems even from a distance, making roof inspections faster and more accurate.

When carrying out drone roof surveys, roofers inspect your property’s roof covering to check its age and condition, and make recommendations on the need for repairs or replacement, either now or at some point in the future. They can also compare the condition to roofs of other similar properties.

Here are the broad-brush steps to using a drone for surveying:

  • Select the right drone for the task.
  • Purchase appropriate software.
  • Plan the flight.
  • Check the settings on the camera.
  • Fly and review the area to be surveyed.
  • Process the resulting images.

The more sophisticated the equipment, the more accurate the survey will be. The best equipment can produce sharp, crisp images that are accurate down to the very last millimetre.

At Environ Property Services, we use state-of-the-art drones that can offer a high degree of accuracy, much more so than doing the job manually with ladders or scaffolding.

Drones are capable of getting a clear, aerial view of your rooftop and take detailed images of it. They are also designed to take precise measurements of your roof. Nowadays, many drones used in roof surveying are equipped with roof-measuring apps and programs that can provide highly accurate roof measurements.

Signs That Your Property Needs Repointing

Will Repointing Stop Damp? Expert Guide to Causes, Fixes & When It Works

If you’re asking, ‘will repointing stop damp,’ the answer is: it depends on the type of damp.

Repointing can effectively address penetrating damp caused by damaged mortar joints, but it may not be enough for rising damp or condensation issues.

This article delves into different types of damp, how repointing helps, and when additional measures are necessary, ensuring you tackle the issue correctly.

Key Takeaways

  • Identifying the type of damp—penetrating, rising, or condensation—is crucial for selecting appropriate damp proofing methods.
  • Repointing can effectively address penetrating dampness by sealing gaps in mortar joints, but additional measures like a damp proof course are often needed to raise dampness and improve ventilation for condensation.
  • Comprehensive damp proofing strategies should include multiple methods, such as enhancing ventilation, fixing structural issues, and applying water repellent treatments to protect properties from moisture ingress.

What Causes Damp Problems in Homes? Understanding the Main Types

Various forms of damp can affect your property, and each requires a specific remedy to tackle the issue effectively. It’s crucial to determine which kind of damp is present in order to select suitable methods for damp proofing.

The main categories include penetrating damp, rising damp, and condensation—each distinct in its origins and indicators. If left untreated, these issues can cause significant damage.

Understanding these types helps pinpoint the root of moisture issues within your home or building. 

Understanding Damp Problems

Penetrating Damp

Penetrating damp arises when water infiltrates a building’s walls from the exterior, manifesting in moisture seeping through to interior surfaces. This condition can stem from structural deficiencies that facilitate water penetration, such as compromised brickwork, existing cracks, or materials with high porosity. Externally triggered aspects like substantial rainfall, blocked gutters and complications with the roofing system intensify this issue, resulting in visible damp spots on inner wall areas.

Signs of penetrating dampness include the presence of moist patches on internal walls alongside potential mould proliferation, which could escalate into wet rot if not addressed promptly. Resolving underlying construction flaws that grant passage for moisture includes actions such as repointing eroded mortar joints and applying defensive measures upon external wall surfaces, which are fundamental strategies used during penetrating damp treatment processes.

Rain penetration can become severe during periods of heavy rain, especially when the exterior walls or outer wall suffer from brick damage or missing tiles. These vulnerabilities allow overflowing water to breach the structure, leading to internal damp patches and possible mould growth.

Rising Damp

Rising damp is a situation where moisture absorption from the ground ascends through a building’s walls by capillary action. As water moves up through microscopic spaces in bricks and mortar, it creates noticeable damp spots on walls and can eventually cause structural harm.

To impede this upward migration of moisture, buildings are equipped with a feature known as a damp proof course (DPC), which serves as an impassable barrier. When there is no DPC present or if it has failed—often an issue in older structures—the integrity of the building can be seriously compromised due to rising damp, as original DPCs may have degraded over time.

Condensation

When warm air laden with moisture encounters surfaces chilled by cold weather, condensation manifests as water droplets on windows, walls, and various other surfaces. This phenomenon is frequently due to elevated internal humidity levels that may stem from everyday activities such as cooking, showering, or indoor clothes drying, which seal the moisture inside.

Should this situation remain unchecked, it can give rise to damp patches and foster the development of mould, which is both harmful to health and detrimental to the structural integrity of building materials. Proper ventilation and effective measures to regulate indoor humidity levels are essential for preventing these issues.

What is Repointing?

Renewing the mortar joints between bricks through repointing is essential for preserving the structural integrity of masonry walls. Over time, environmental factors and weathering may erode mortar, creating openings that enable moisture ingress.

It’s important to use a permeable mortar during repointing to prevent damp accumulation within walls that facilitates moisture evaporation. When the existing mortar has sustained substantial damage, carrying out this process is key in addressing rising damp and penetrating damp issues.

What is Repointing?

How Damaged Pointing Contributes to Damp

Cracked or missing mortar joints due to weathering, frost damage, or lack of maintenance can result in significant damp issues within a property. These compromised points allow water to seep through and infiltrate the walls, causing structural damage and visible damp patches.

To effectively counteract penetrating damp, repointing is utilised to fill these gaps and reinforce the wall’s ability to resist water ingress. Nevertheless, for lasting results, it is also crucial to remedy any contributing factors, such as roof damage or gutters that are not functioning properly.

Will Repointing Stop Damp?

Repointing is notably efficient in addressing certain damp issues, especially those caused by penetrating damp. Restoring the mortar joints helps to close off crevices through which moisture can enter, thus averting the formation of damp patches and subsequent water damage. However, repointing alone might not tackle all types of damp problems.

For example, treating rising damp typically involves more extensive measures such as fitting a new damp proof course. In cases where condensation is the problem, enhancing ventilation and managing indoor humidity levels may also be necessary alongside repointing efforts.

Understanding when repointing is sufficient and recognising when additional steps are necessary is crucial for an effective strategy against moisture penetration and related issues.

When Repointing Can Effectively Fix Damp Problems

Repointing is highly efficient for combating penetrating damp. Repointing inhibits water ingress into walls by sealing cracks and voids within the mortar joints.

This technique becomes particularly vital when the current mortar shows signs of decay, since it reinforces the wall’s capacity to resist moisture and uphold its structural integrity.

When Repointing Isn’t Enough for Damp-Proofing

Repointing alone might not rectify every issue related to damp. If the damp originates from ground moisture, fitting a damp proof course (DPC) can create an effective barrier against it.

Addressing condensation issues typically necessitates enhanced ventilation and managing humidity levels in conjunction with repointing efforts at this stage.

To tackle damp proofing effectively, a multifaceted strategy is often employed that targets different origins of moisture ingress. This approach could include repairing any damage to the roof, restoring bricks that have spalled due to exposure to elements, and confirming adequate drainage surrounding the property’s roof area.

Additional Measures for Comprehensive Damp Proofing

To tackle damp effectively, a mix of strategies is often necessary, going beyond simply repointing. Notably:

  • Installing a damp proof course (DPC) is critical in thwarting the ascent of rising damp.
  • Elevating airflow can be instrumental in regulating issues with condensation.
  • Addressing structural faults can bolster the success rate of measures taken to combat dampness.
  • The application of treatments that reject water can refine your property’s resistance against moisture.

Through these initiatives, you’re equipped to thoroughly resolve problems associated with dampness within your estate.

Installing cavity wall insulation can further shield your home’s interior from temperature fluctuations and moisture seepage through external walls. If your home begins to feel damp despite these measures, it may indicate underlying structural damage or inadequate moisture control.

Adopting this multifaceted stance towards combating moisture intrusion and related complications ensures an all-encompassing solution for safeguarding your real estate from various forms and effects of wetness penetration.

Damp Proof Course (DPC): What It Is and Why You Might Need One

A damp proof course is a critical installation for preventing moisture from rising into walls due to capillary action, a phenomenon known as rising damp. This process involves creating a robust, impenetrable barrier within the wall structure. For optimal effectiveness, the DPC should be placed no less than 150 mm above ground level, which helps to effectively halt moisture migration from the ground into the building.

It is an essential outlay, particularly in older properties where original methods of damp proofing may have lost their effectiveness over time. Ensuring that a DPC is properly installed is vital for effectively protecting against damp issues.

Improving Ventilation

Enhancing air circulation is essential in controlling condensation that, if neglected, may result in damp patches and the development of black mould. By promoting effective ventilation, indoor humidity levels are lowered, thwarting moisture buildup on cooler surfaces and improving the ease of breathing within your space.

It is especially crucial to ensure adequate airflow in areas prone to high moisture levels, such as kitchens and bathrooms. Improving the ventilation in these spaces can greatly diminish the likelihood of encountering damp-related problems due to condensation.

Water Repellent Treatments

Applying breathable water-repellent coatings to masonry walls helps thwart the infiltration of rain while simultaneously permitting moisture to evaporate. This strategy ensures protection for the structure, maintaining a dry state within the solid wall and diminishing potential water damage, particularly concerning both exterior and cavity walls.

Selecting suitable materials for these applications is critical to their success and to preserving the structural integrity of the masonry. Utilising unsuitable substances like hard lime mortar or cement mortar may trap moisture, thereby expediting deterioration.

Comprehensive Damp Solutions by Environ Property Services

At Environ Property Services, we identify and eliminate the root causes of damp to protect your home in the long term. As a leading damp proofing and property care company in London, we specialise in diagnosing and resolving all forms of damp, penetrating damp, rising damp, and condensation, with intelligent, effective, and lasting solutions.

Whether your property needs expert repointing to stop water ingress, a damp proof course (DPC) to combat rising moisture, or ventilation upgrades to control condensation, we deliver precision workmanship with zero guesswork.

Our team combines building science with hands-on expertise to safeguard your home’s structure, health, and value.

Our comprehensive services include:

  • Specialist Repointing
  • Rising Damp Treatments & DPC Installation
  • Condensation & Mould Control
  • Basement & Structural Waterproofing
  • Heritage Property Damp Repairs
  • Detailed Damp Surveys
  • And More..

Book a professional damp survey with Environ Property Services today.

Get Repointing Services That Do More Than Just Fill Gaps

Repointing is often your property’s first line of defence—but only if it’s done right. At Environ Property Services, we don’t simply apply fresh mortar. We remove all compromised joints, use breathable lime-based mortars, and restore the wall’s integrity to resist rain and moisture.

This is especially crucial for treating penetrating damp caused by damaged brickwork or eroded pointing.

But effective damp proofing means looking beyond the bricks. Our team also inspects your home to ensure no weak point is left behind. When we repoint, we protect, not just repair.

Every solution is designed to work together, ensuring your home stays dry, mould-free, and structurally sound for decades to come. Contact us today.

Signs That Your Property Needs Repointing

Visible deterioration in the mortar joints, such as cracks and gaps, alongside damp patches on interior walls and decaying mortar, are key indicators that your property requires repointing. These signs suggest that the integrity of the mortar has been compromised, permitting moisture to seep through into the walls.

Addressing these problems promptly is essential for preserving your property’s structural stability. By undertaking repointing work, you can rectify these defects and reinstate the wall’s ability to resist penetration by moisture.

Signs That Your Property Needs Repointing

Frequently Asked Questions

Can repointing alone stop all types of damp?

Repointing alone cannot stop all types of dampness; it is primarily effective for penetrating dampness but does not address rising dampness or condensation, which may require a damp proof course or enhanced ventilation.

What are the signs that my property needs repointing?

If you notice visible cracks and gaps in the mortar joints, crumbling mortar, or damp patches on the internal walls of your property, these are indications that deterioration has occurred, allowing moisture to seep through.

It is crucial to deal promptly with problems as they arise to preserve the structural integrity of your property.

How much does it cost to install a damp-proof course?

The cost to install a damp proof course typically depends on the property’s size and condition.

Why is ventilation important in preventing damp?

To avoid damp issues, it is essential to maintain proper ventilation as it reduces the levels of indoor humidity. This reduction helps prevent condensation and mould formation, which are common precursors to damp problems.

What additional measures can enhance damp proofing?

To enhance damp proofing, consider installing a damp proof course, improving ventilation, and applying breathable water repellent treatments to masonry walls.

These measures collectively help prevent moisture accumulation and ensure long-term protection against dampness.

Conclusion

To summarise the critical considerations, it is essential to identify the specific type of damp affecting a building to determine an effective remedy. While repointing may be beneficial for addressing penetrating damp, this method alone might not suffice when dealing with rising damp or condensation-related issues. A combination of strategies, which could include adding a damp-proof course, enhancing ventilation, and applying water-resistant treatments, is vital for comprehensive damp proofing.

Ultimately, ensuring your property’s protection against moisture requires adopting an integrated approach. Focusing on root causes and employing various moisture control methods can help shield your structure from potential damage while preserving its structural integrity.

Choose Environ Property Services for expert, personalised solutions utilising cutting-edge technologies designed specifically for managing and rectifying damp issues and reporting.

Treating Bad Pointing

Does Bad Pointing Cause Damp? Signs, Causes, and Effective Fixes

Yes, bad pointing causes damp. When the mortar between bricks fails, moisture seeps in, leading to damp problems.

In this article, we will explain how pointing works, why bad pointing causes damp, and how you can fix and prevent these issues.

Key Takeaways

  • Proper pointing is essential to prevent moisture ingress, which can lead to damp issues and structural damage.
  • Regular maintenance and timely repairs of pointing are crucial for the integrity of masonry and to avoid costly degradation.
  • Engaging professional services for repointing ensures high-quality restoration and enhances long-term protection against damp.

What Is Brick Pointing and Why Does It Matter for Damp Prevention?

Pointing is the term used for the application of mortar in the gaps between bricks or stones within masonry. This process enhances visual appeal and also plays an essential role in blocking water from entering the walls.

A variety of pointing methods exist, such as cement pointing, which offers benefits that include better water runoff and lowered upkeep requirements, highlighting its importance in construction work.

The main objective of pointing lies in its ability to repel excess moisture. When done correctly, pointing acts as a defence mechanism against moisture infiltration into masonry structures. Doing so helps preserve buildings from damp conditions and subsequent water-related damage that can undermine their structural integrity if left unchecked.

Maintaining your property’s pointing in top-notch condition is key to ensuring its durability over time. Routine checks coupled with immediate attention to minor damages can fend off major complications regarding building stability later on.

Causes of Bad Pointing That Lead to Damp Problems

Various environmental and physical factors can lead to inadequate pointing in masonry. A significant contributor is the fluctuation in weather conditions, which causes bricks and mortar to swell and shrink with temperature changes, ultimately leading to their deterioration. When freezing rain infiltrates masonry, it can freeze and expand, creating fissures that make walls more vulnerable to dampness.

Common causes of damp include porous bricks, missing roof tiles, and blocked guttering—all of which allow water to enter the building fabric. Cold weather, especially following heavy rain, leads to frost damage and rainwater penetration that gradually breaks down mortar beds in both external and internal walls.

Wind-driven rain also plays a major role in faulty pointing. This relentless assault erodes the mortar over time, reducing its effectiveness in repelling water. In coastal areas, salt-laden air can cause decay in both masonry and mortar, primarily due to corrosion.

Additionally, poor maintenance of water drainage systems, such as gutters, exacerbates these issues. When water overflows, it damages the pointing and creates concentrated streams that accelerate deterioration. Prolonged exposure to moisture not only discolours the mortar but also weakens it, compromising the structural integrity of the brickwork.

External damage and frost events further contribute to the long-term decline in pointing quality. Notably, frost-related damage can exacerbate existing vulnerabilities, increasing the risk of wall dampness infiltration. 

Causes of Bad Pointing

How Bad Pointing Leads to Damp

Inadequate pointing can allow moisture to infiltrate walls, instigating damp-related complications. Brickwork’s excessive moisture absorption can manifest through noticeable symptoms like mould development and degradation of wallpaper or plaster. Such occurrences mar not only a building’s visual appeal but also threaten its structural integrity.

Porous material within solid walls and cavity wall insulation can trap moist air, increasing the risk of rising damp and decay within interior walls. Without a waterproof coating on outer walls, water droplets driven by wind or rain can easily seep into weakened joints, further exacerbating damp problems.

The movement of moisture from a structure’s exterior into its interior is referred to as penetrating damp—a condition that fosters problems including black mould formation, wet rot, and even potential failure of the building’s infrastructure. Inefficient pointing may exacerbate these issues during periods of heavy rainfall, leading to expanding damp patches on walls and underscoring the necessity for well-maintained mortar joints to prevent penetrating damp.

Adverse weather events, such as freeze-thaw cycles, contribute to material deterioration. When temperatures drop significantly, this deterioration causes cracks that compromise brick integrity. Poor water drainage systems amplify this risk by retaining excess water against brick surfaces.

By recognising how faulty pointing leads to moist conditions within your property’s walls, you can better gauge appropriate curative and preventative measures against pervasive dampness concerns.

How Bad Pointing Leads to Damp

How to Identify Damaged Pointing in Brickwork (Before Damp Sets In)

It is essential to identify failing pointing in order to avert damp issues. Cracks within the mortar situated between bricks are indicators of inadequate pointing, which can result in problems with moisture. If bricks seem loose, this could indicate weakening of the pointing and permit water infiltration into the brickwork.

Another unmistakable symptom of compromised pointing is visible gaps within the mortar joints. These openings allow moisture to penetrate easily, leading to damp patches and associated complications. It’s critical to perform routine checks on these mortar joints to spot early signs of damage and rectify them promptly before they worsen.

One of the clearest signs of damp infiltration through brick walls is staining or moisture appearing on interior walls, especially when the ground level is uneven or improperly sloped. If outer walls are absorbing humid air or show signs of missing tiles, the pointing and waterproof barriers have likely been compromised.

Gutter overflow may intensify bad pointing by directing concentrated flows of water onto certain parts, hastening its wear wear-down process. Keeping vigilant through regular monitoring for such indicators and executing inspections is key in safeguarding your property from potential damage caused by dampness.

Can Bad Pointing Affect Structural Integrity?

The quality of pointing is crucial for a building’s structural integrity. Poorly executed pointing can undermine this stability and create substantial safety risks. Rising water can lead to the deterioration of bricks and mortar, such as flaking and crumbling, which weakens the entire structure.

Utilising professional services for repointing and upkeep can markedly enhance the durability and resilience of masonry buildings. Well-maintained pointing not only improves the brickwork’s visual appeal but also maintains structural soundness.

The negative effects of inadequate pointing on a building’s structural integrity are significant. It is vital to carry out routine maintenance and address repairs promptly to avoid minor problems escalating into extensive building defects.

How to Fix Bad Pointing

The process of correcting bad pointing, known as repointing, entails removing the old mortar and filling in with fresh material. This regular upkeep is essential to safeguard masonry from the impacts of weather and the intrusion of moisture.

It’s imperative to have a professional evaluate your brickwork to determine its specific restoration needs. These experts utilise sophisticated tools and techniques to ensure that repointing work is done at a high standard, which helps prevent additional harm while minimising future repair expenses.

In order to effectively damp proof an area, it’s necessary not only to replace any materials that have been damaged, but also address what causes damp in the first place. The application of water-repellent treatments can significantly bolster your brickwork’s defences against moisture penetration.

Treating Bad Pointing

Preventing Damp from Bad Pointing

Addressing the penetrating damp caused by faulty pointing can be achieved through diligent upkeep and defensive strategies. Here’s a rundown of practical methods.

  1. Keep gutters and downspouts in good repair to circumvent the accumulation of water that induces dampness in brickwork.
  2. Employ waterproof creams to construct an impediment against moisture intrusion.
  3. Position a damp proof course as a defence mechanism against infiltrating damp.

Adhering to these approaches aids markedly in curtailing the incidence of damp within your property, facilitating more effective regulation over moisture and condensation.

To stop penetrating damp issues before they spread, apply a breathable waterproof coating and address any missing roof tiles or broken gutters. Properly maintaining both solid and cavity walls can treat penetrating damp effectively while keeping moist air out of your home’s structure.

Routine inspections of gutter systems, downspouts, roofs, and windows are crucial for preventing masonry from succumbing to absorbed moisture.

Breathable water-repellent treatments designed specifically for masonry can be utilised as preventative measures against incoming wetness while allowing for adequate ventilation within the brickwork structure itself. Taking such proactive steps is instrumental in lowering the likelihood of experiencing issues related to poor-quality pointing workmanship.

Safeguard Your Home with Expert Pointing and Damp Solutions

At Environ Property Services, we understand how crucial it is to maintain the integrity of your home. One of the most overlooked yet essential aspects of home maintenance is ensuring your brickwork is properly pointed. Bad pointing allows moisture to seep into your walls, leading to damp issues that can cause serious structural damage.

Our professional team specialises in repointing services, expertly restoring the mortar between your bricks to prevent water ingress and ensure the longevity of your property.

Here’s how we can help:

  • Expert Repointing Services: We remove old, deteriorated mortar and replace it with high-quality, durable materials to restore the stability of your brickwork.
  • Damp Proofing Solutions: Our advanced damp-proofing treatments protect your home from moisture, preventing issues like mould, rot, and structural decay.
  • Cost-Effective & Long-Lasting Results: We provide reliable and efficient services that save you from expensive repairs down the road, ensuring lasting protection for your property.
  • Tailored Services: We assess your unique needs and deliver customised solutions that fit your home’s specific requirements.

Don’t wait for the damage to worsen. Contact us now for a comprehensive inspection, and let us restore your property’s protection and structural integrity.

Why You Need Professional Repointing and Damp Protection

Over time, weather, wear, and improper drainage can cause the mortar between your bricks to weaken, leading to the infiltration of moisture. This issue, known as bad pointing, can result in damp problems that affect both the appearance and the structural stability of your home. If left untreated, the damage can escalate quickly, leading to expensive repairs and even safety risks.

By choosing Environ Property Services, you ensure that your property receives the best possible care. Our team uses top-tier materials and modern techniques to prevent future water damage, preserving the beauty and durability of your home.

Whether you’re dealing with small cracks or large-scale repairs, we deliver precise, reliable, and efficient solutions tailored to your needs..

Frequently Asked Questions

What is pointing, and why is it important?

Pointing is the application of mortar to the joints between bricks or stones in masonry, which is essential for preventing water ingress and maintaining the structural integrity of buildings.

Its proper execution is vital for the longevity and stability of construction.

What causes bad pointing?

Bad pointing is primarily caused by environmental factors such as severe weather changes, erosion from wind and rain, and improper drainage maintenance.

Addressing these issues is essential for maintaining the integrity of the pointing.

How does bad pointing lead to damp issues?

Poor pointing can create gaps that permit moisture infiltration into walls, resulting in damp issues like mould growth and structural damage.

Addressing this problem promptly is essential to maintain the integrity of the building.

How can I identify damaged pointing?

You can identify damaged points by looking for cracked mortar, loose bricks, visible gaps in the joints, and signs of concentrated water flow from overflowing gutters.

Addressing these issues promptly will help maintain the integrity of your structure.

What are the cost considerations for repointing?

Typically, the cost of repointing is estimated to be between £50 and £60 per square meter. Additional charges may apply if scaffolding is required or if old mortar must be eliminated.

To accurately predict the total expenditure involved, it’s crucial to carefully evaluate the current state of your masonry work.

Conclusion

Ensuring that the pointing of your property is in good condition is key to averting damp problems and preserving its structural soundness. Inadequate pointing can result in a variety of complications, including the invasion of penetrating damp, the proliferation of mould, and potential harm to the structure. It’s vital to carry out consistent upkeep and address repairs promptly to avoid these issues.

Utilising expert services such as those we provide at Environ Property Services guarantees top-notch treatment for your home. Leveraging our proficiency in tasks like brick repointing, implementing damp-proof measures, and conducting restoration work means you can rest assured that your dwelling will stay moisture-free, secure from hazards, and structurally stable.

Enhancing Ventilation to Prevent Damp

How to Stop Rising Damp in Old Houses: Proven Treatments & Prevention Tips

Dealing with rising damp in old houses is crucial for maintaining structural integrity and a healthy living environment.

This article breaks down how to stop rising damp in old houses by helping you recognise its signs, understand its causes, and apply effective treatments.

Key Takeaways

  • Rising damp occurs when moisture from the ground travels upwards through porous materials, leading to structural damage and potential health risks.
  • Common signs of rising damp include damp patches on walls, peeling paint, cracked plaster, and musty odours; early detection is crucial for effective treatment.
  • Effective solutions for rising damp include repairing or installing damp proof courses, enhancing ventilation, and conducting regular maintenance to prevent moisture issues.

What Is Rising Damp in Old Houses and Why Does It Happen?

The upward movement of moisture from the ground into a building’s walls, known as rising damp, occurs through the porous materials in these structures. This issue is often seen in older buildings where an original damp proof course (DPC) might be absent or has degraded over time.

In the absence of an effective DPC, water can rise within the small tubes present in substances like brickwork, stonework and lime mortar due to capillary action, which may result in significant damage to structural integrity.

As a consequence of rising damp:

  • Mortar joints could lose their strength
  • Plaster might begin crumbling away
  • The stability of the home’s critical elements may decline
  • Damage could occur to both the structure and appearance
  • It can negatively affect interior design with paint peeling off and deterioration of decorative details

If not addressed promptly, the risks associated with escalating repair costs grow alongside potential health hazards for residents.

Early detection and rectification are imperative for avoiding expensive repairs down the line while ensuring that living spaces remain secure and enjoyable.

Understanding Rising Damp

How to Identify Rising Damp in Old Properties: Key Warning Signs

Identifying early symptoms of rising damp is crucial in averting significant harm to your property. Typical signs are damp spots on walls, paint flaking away, plaster cracking, and a distinct musty smell.

Such indicators suggest not just the infiltration of excess moisture but also possible structural impairments, the presence of water droplets, and risks to health.

Damp Patches on Walls

Visible damp patches at the bottom of walls are a definitive sign of rising damp. These dark areas may extend upwards for over a meter, marked by tide marks created by salt deposits created by evaporating moist air. Swift recognition is key to averting additional complications related to damp.

These patches signal that moisture has infiltrated through the wall, potentially leading to an exacerbated problem with damp if left unattended.

The extent of this wetness and its electrical resistance can be measured using electrical moisture meters to determine proper remediation strategies.

Peeling Paint and Cracked Plaster

Cracked plaster and flaking paint on walls often indicate that they have been exposed to moisture for an extended period. This deterioration results from the absorption of moisture due to rising damp, which undermines the ability of paint to stick and leads to crumbling plaster. Typically, this is also marked by a noticeable darkening in these areas, clearly pointing towards a problem with damp.

Addressing such issues promptly can prevent more severe damage. The unsightly appearance of peeling paint and cracks in your home’s walls detracts from its visual appeal and may indicate deeper moisture problems that can compromise your walls’ structural integrity.

Musty Odor

The emergence of a musty smell in your residence can be a key sign of rising damp, which is typically associated with the proliferation of mould and mildew due to wet conditions. These organisms generate foul odours and present potential health hazards, especially for individuals who have respiratory issues or suffer from allergies.

When moisture ascends through walls, it creates an optimal setting for mould growth and mildew to flourish. This process results in fungal expansion, which contributes to persistent musty odours throughout the home.

Causes of Rising Damp in Older Houses

Rising damp is a frequent issue in older properties, often attributed to their distinct construction techniques and materials. These period homes, encompassing ancient buildings and antiquity residences, frequently lack an adequate damp proof course (DPC) or suffer from the degradation of any original DPC with time. This leaves them prone to moisture seeping through.

The solid walls found predominantly in properties dating back to early Victorian times are notorious for promoting condensation since they typically remain cooler and trap moisture within an ageing building’s structure.

The traditional use of more permeable materials, such as stone, brick, and lime mortar, also facilitates greater moisture absorption compared to contemporary substances utilised in new constructions, complicating matters.

Modern refurbishments use non-breathable materials that can trap moisture inside wall structures, which exacerbates dampness issues in these environments. Additional factors, such as poor drainage systems combined with external modifications like elevated garden beds, may unintentionally redirect water toward structural walls, increasing the risks of rising damp.

Modifications, including extensions that evade existing measures designed for damp-proofing, can also initiate incidents involving rising damp across historic dwellings. To safeguard heritage homes from succumbing under these conditions, it necessitates ongoing maintenance centred on preserving functional integrity around DPC while ensuring efficient handling concerning drainage systems.

Causes of Rising Damp in Older Houses

How to Treat Rising Damp in Old Houses: Best Repair Methods That Work

Effectively addressing rising damp requires pinpointing the moisture’s origin, fixing or putting in place damp-proof courses, and tackling any related structural problems. A range of techniques can be used, from chemical solutions to establishing physical barriers. These methods are tailored to varying situations and levels of severity when it comes to treating rising damp and ensuring effective damp treatment overall.

Replacing or Repairing the Damp Proof Course

A damp proof course serves as a critical shield to inhibit moisture from ascending through the walls of a building. In older residences, it’s possible that this protective layer is absent or has sustained damage, making repair or renewal necessary.

To form a fresh barrier against moisture, one widespread technique involves boring holes in the wall and instilling a structural waterproofing treatment. This approach proves highly successful for addressing issues related to rising damp and existing damp courses.

Nevertheless, setting up a DPC should be entrusted to skilled professionals. Improper installation could exacerbate problems and incur additional expenses. At times, more aggressive measures might be essential, including stripping away up to two layers of bricks to adequately fit in a new DPC.

Using Damp Proofing Cream to Stop Rising Damp Effectively

Administering damp proofing cream serves as a powerful solution for combating rising damp. This substance is applied into pre-drilled openings within the mortar lines, allowing it to infiltrate the brickwork and create an impervious barrier against moisture. Typically comprised of silane, this key component coats the internal pores of the wall structure to stop upward moisture movement.

The technique involving damp proofing cream is notably less disruptive and proves highly efficient if executed properly. Meticulous preparation steps are crucial, such as eliminating any plaster impaired by damaged damp proof barriers and making certain that brick surfaces are left dry and uncovered before application.

Protecting Your Walls with Damp Proof Paint

A silicone-based damp-proof paint serves as a barrier to stop moisture from permeating walls, making it an effective solution for combating rising damp. By creating a protective layer with this paint, mould and mildew growth are suppressed, safeguarding the structural health of the walls.

It’s important to choose appropriate damp-proof paint tailored to your property’s age and state. Seeking professional guidance is advisable to guarantee that this paint delivers optimal protection against moisture and is applied correctly.

Protect Your Home with London’s Damp Proofing Specialists

Environ Property Services is London’s trusted expert in stopping rising damp in old houses. With decades of hands-on experience, we provide targeted, effective damp proofing solutions that restore the integrity of your home and protect your family’s health.

Whether your property needs a chemical damp proof course, timber replacement, structural repair, or full basement waterproofing, our team delivers a full-service approach using Sovereign-approved products, the highest standard in the UK market.

Here’s what you can expect when you work with Environ Property Services:

  • Meticulous damp survey to assess your property
  • Honest diagnosis and evidence-based reports before any work begins
  • Expert treatment of rising damp, lateral damp, penetrating damp, and condensation
  • Installation and repair of damp proof courses (DPCs) and membranes
  • Affordable PIV ventilation units to tackle moisture and mould
  • And more.

We understand the unique challenges of heritage buildings and treat each property with the attention it deserves. We investigate thoroughly, using proven methods to detect and stop rising damp at its source.

We’re a family-run business, and our commitment to integrity, quality, and customer-first service has earned us the trust of hundreds of London homeowners.

Call us now on 020 4538 3286 to book your damp survey.

How to Improve Ventilation in Old Homes to Prevent Damp Issues

Enhancing home ventilation is vital to prevent dampness. Adequate ventilation can help reduce condensation and allow moisture levels from activities like cooking and bathing, which can otherwise contribute to poor ventilation and damp conditions, including water vapour.

Enhancing Ventilation to Prevent Damp

Installing Air Bricks

Air bricks play a crucial role in promoting air flow under timber ground floors and within wall cavities, reducing the accumulation of moisture and staving off damp-related complications that might manifest around the skirting board area.

These elements must be positioned thoughtfully to optimise ventilation, especially under floorboards where damp is prone to develop.

It’s essential to install these air bricks above the exterior ground level, as this practice safeguards against water entering during bouts of heavy rainfall. By doing so, enhanced ventilation can be achieved without inviting moisture problems into your home. For efficient control over such issues, one should undertake the installation of air bricks.

Using Dehumidifiers

Dehumidifiers are efficient devices for managing the moisture content in a residence’s air. By reducing relative humidity, they make interior environments less conducive to mould proliferation and diminish the likelihood of dampness. This is especially important in areas that are naturally susceptible to moisture, such as basements, bathrooms, and kitchens.

Positioning dehumidifiers strategically in areas where moisture accumulates enhances their efficacy.

Continuous operation can enhance indoor air quality by sustaining ideal humidity levels while averting musty smells that typically accompany humid air, moist atmosphere, excessive dampness, and dew point convergence.

Why Regular Maintenance Is Key to Preventing Rising Damp

It’s crucial to carry out ongoing maintenance and checks to detect and tackle possible damp problems early on, particularly by observing the state of surfaces and materials adjacent to damp walls and quickly fixing any deterioration.

Professional Damp Surveys

A comprehensive damp survey is the first step in effective treatment. Professional damp surveyors use tools like moisture meters and humidity gauges to assess dampness and identify core causes.

A thorough damp survey pinpoints affected areas, structural concerns, and environmental variables, providing a clear treatment and prevention plan.

This proactive approach can save homeowners from costly repairs and extensive damage.

Fixing Leaky Roofs to Stop Water Damage and Rising Damp

It’s critical to maintain the condition of roofing components, including tiles and flashing, to avert water from seeping in and causing damp problems. Fixing rainwater pipes that are not functioning properly, such as gutters and downspouts, is imperative to prevent overflowing water, which can result in moisture accumulation within walls and ceilings.

Conducting routine checks on areas where roof planes intersect (valleys) and on flat roofs can reveal issues likely to allow water entry.

Swiftly dealing with damaged or absent roof tiles is vital for preserving the integrity of the roof’s waterproof shield, safeguarding both the structure’s external walls and internal walls against complications associated with a leaky roof and damp conditions.

Contact Environ Property Services Today

Environ Property Services is renowned for its outstanding professionalism, dependability, and ethical conduct. We are dedicated to achieving exemplary standards in every project we undertake. Our commitment to preserving architectural history goes hand in hand with our innovative solutions for preventing dampness, highlighting our distinction within the industry.

We offer personalised consultations to identify specific moisture issues and provide tailored advice and strategies to meet individual needs. Our team specializes in executing sensitive heritage operations, structural reinforcements, and comprehensive renewal of stone and brickwork, including lime rendering, all aimed at preserving the historical significance and charm of each property.

Frequently Asked Questions

What are the common signs of rising damp in an old house?

Common signs of rising damp in old houses include damp patches on masonry walls, peeling paint, cracked plaster, and musty odours, all of which indicate moisture penetration that could lead to mould growth.

How can I treat rising damp effectively?

For an effective rising damp treatment, identify the source of moisture, repair or install a damp proof course, and apply damp proofing cream followed by damp proof paint, preferably with professional help.

This comprehensive approach will help mitigate the problem efficiently.

Why is ventilation important in preventing damp?

Ventilation is crucial in preventing damp. It lowers moisture levels from everyday activities, thereby inhibiting mould growth and potential structural damage.

Maintaining good airflow helps protect your living environment.

What role do damp surveys play in managing damp issues?

Surveys focused on dampness are essential for correctly identifying the severity and sources of moisture within a building, which allows appropriate corrective measures to be implemented.

These evaluations offer a comprehensive strategy to resolve problems before they worsen, thereby safeguarding your property investment.

How can Environ Property Services help with damp issues in heritage buildings?

Environ Property Services effectively addresses damp issues in heritage buildings by combining traditional skills with modern technology for specialised damp proofing and restoration.

This approach ensures the preservation of historical architecture while resolving damp problems.

Conclusion

Recognising the signs, comprehending the causes, and applying effective methods to combat rising damp are essential for preserving the structural soundness and visual charm of older homes. Early detection allows property owners to defend their estates against severe damage that could lead to expensive repair work.

Proactive strategies such as improving air circulation, consistently checking the property’s condition, and enlisting specialised assistance from firms like Environ Property Services can significantly keep residences secure, hygienic, and aesthetically pleasing. To maintain your home’s value, take immediate steps against the threats posed by rising damp.